As we know, when developing a product, taking advantage of as many different cloud solutions as possible not only saves time and complexity but also allows us to minimize various administrative costs.
Nowadays many of us are developing cloud-native applications or migrating to the cloud. During this time, we try to benefit from different solutions of cloud providers such as PaaS, SaaS and Serverless in order to minimize various costs. Azure Active Directory B2C is one of the cloud solutions we can use for consumer identity and access management. Especially if we are developing a customer-facing application, it is essential to have a secure and scalable consumer identity management service.
In the .NET world, Identity Server is usually used for such cases. Of course, we need to manage the security, scalability and hosting of the identity service, as in other services. On the other hand, by using Azure AD B2C as an alternative, we can ensure that Azure takes care of the security, scalability, and compliance with data protection regulations such as GDPR and other complexities on our behalf, and we can focus on our core business.
Azure AD B2C
This service offers us many functionalities and flexibility in consumer identity and access management.

- It supports OAuth 2.0 and OpenID Connect.
- Along with customizable interface, it also provides different built-in functionalities such as “sign in”, “sign up”, “reset password”.
- Also built-in threat detection and multi-factor authentication.
- It has integration with different identity providers.
- It has a customizable attribute structure. In other words, we can have any user-specific attributes we want per our needs.
Now, to understand the topic better, let’s create a simple project with Azure AD B2C.
Let’s Create an Azure AD B2C Tenant
In order to use Azure AD B2C, first we need to create a tenant. We can think of Tenant as an isolated container that holds all user information, application and API registrations and various resources like policies for an organization.
First, let’s follow the steps here to create a tenant. I have created an organization called “MyTodo“. After creating the tenant, we need to switch to the directory containing the tenant, which we created. To do this, go to the “Directories + subscriptions” section on the Azure portal and switch to that directory.

After switching the directory, we can start making some configurations on Azure AD B2C for identity access operations.
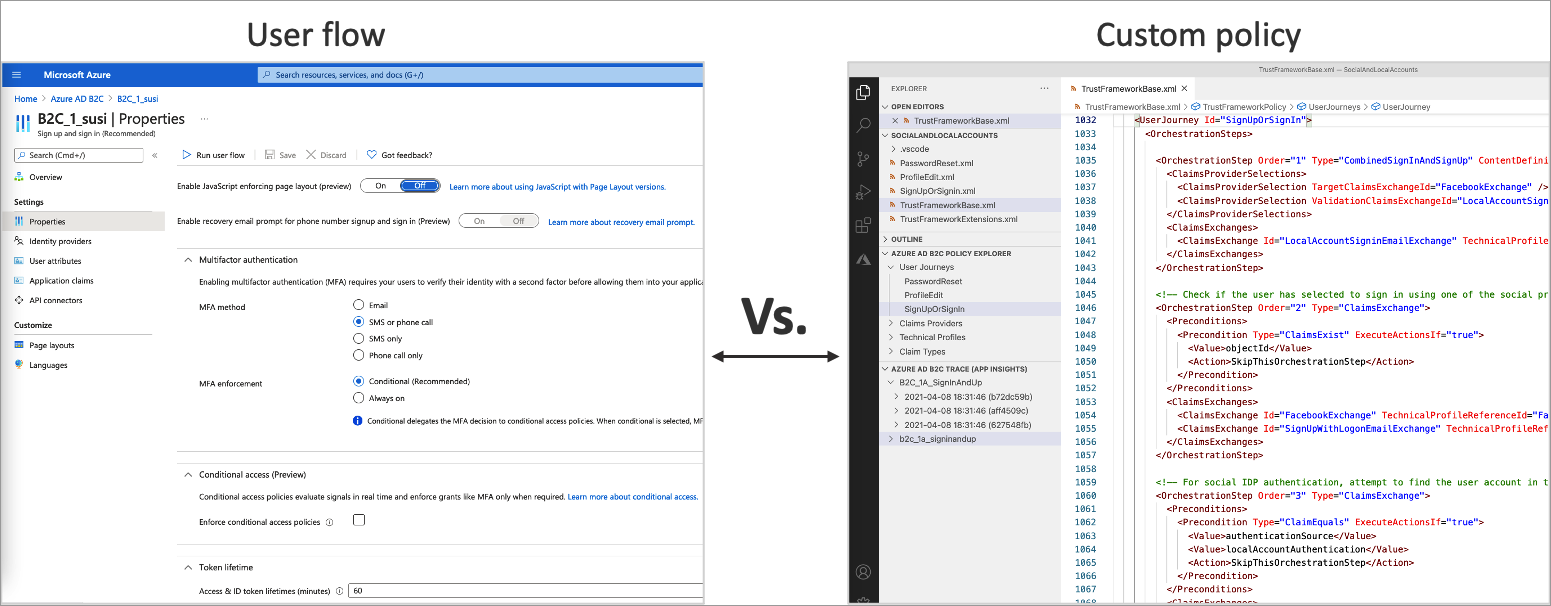
Within Azure AD B2C, for consumer identity and access management operations, we can define various business logic that users must follow. We can perform these operations in two different ways. If we don’t have a complex process, such as performing REST calls, we can quickly begin by using the provided user flows. However, if we have a complex process and require a policy-driven approach, we must define our custom XML-based policies.
In this article, we will explore how we can use predefined user flows. With the predefined user flows, we can easily and quickly perform many of the actions we need for consumer identity and access management.
Some of the actions that we can perform;
- We can decide the account types that will be used for sign-in process (like social accounts or local accounts)
- We can decide which attributes that we need to get from the user
- We can make use of MFA
- We can also specify which claims that we need to carry with the token
- We can also customize the UI
As we can see, many standard features that we may need are provided to us though user flows.
Let’s Create a User Flow
Now let’s quickly define a user flow. To do this, let’s go to the Azure AD B2C instance we created and click on “User flows” under the “Policies” menu. Then, click on “New user flow” and select the “Sign up and sign in” option. As the name suggests, we will configure the flow that allows users to sign up and sign in to our system. Choose the recommended option for “Version” and configure the flow as follows. Then, make a note of the name of the flow for later use.
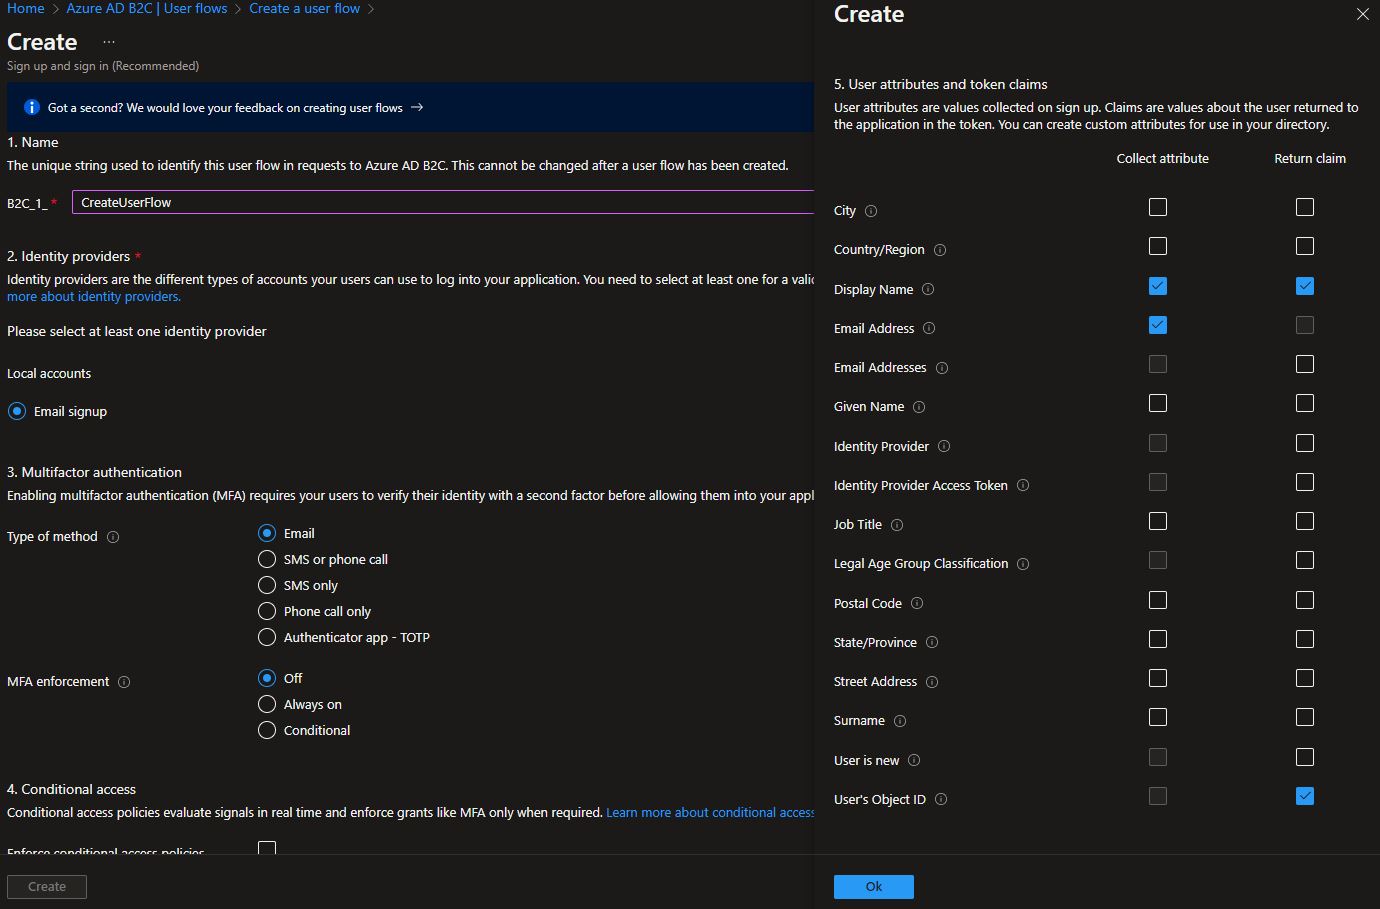
As we can see here, we can enable MFA, and configure the attributes we want to get from the user and the claims in the token. We can also perform different configurations after the flow is created.
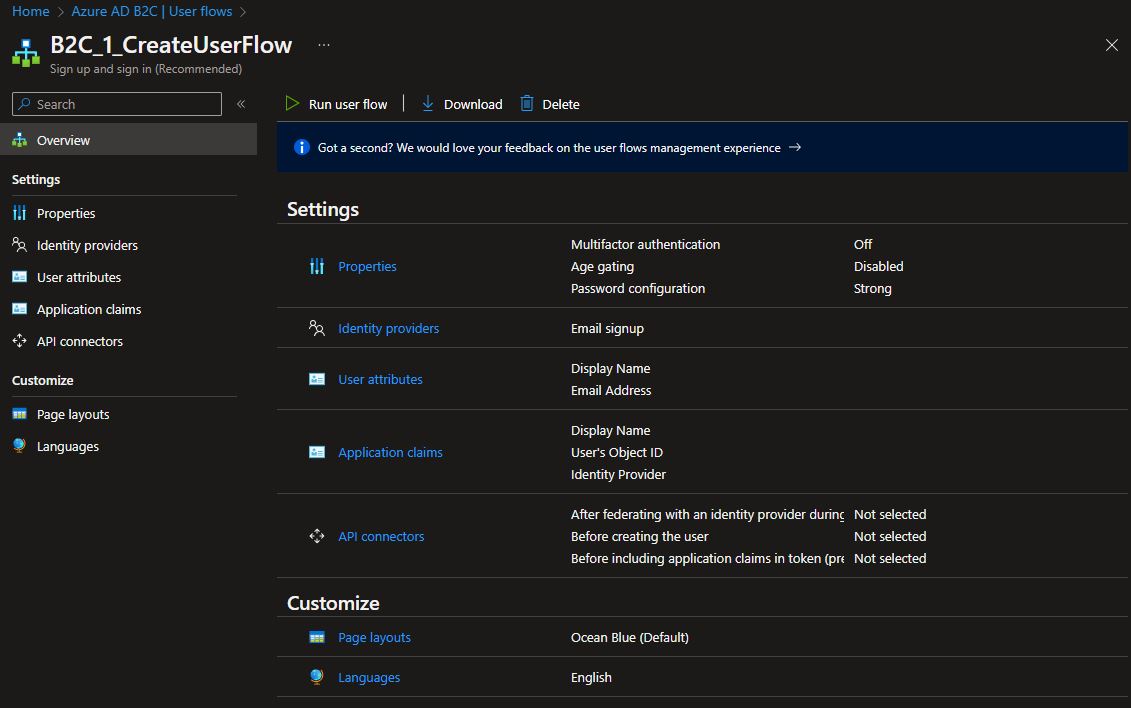 For example, we can change attributes, add API connectors to be called at various stages, or change the UI layout.
Let’s Create a Sample Project
Start with a Web App
Let’s assume that we will develop a customer-facing Web App and we want to delegate identity access and management operations to Azure AD B2C in order to simplify and speed up the development process. Let’s also assume that this Web App needs to securely consume a Web API.
First, let’s create a .NET 7 Web App project named MyTodoOrgWeb with the following command.
dotnet new webapp -n MyTodoOrgWeb --auth IndividualB2C
Here, by specifying the “auth” option as “IndividualB2C,” the .NET CLI automatically generates the template required for us to use Azure AD B2C, along with the “OpenID Connect” configuration.
Now, before configuring this project, we first need to define it within the tenant we have created. This way, we will be able to perform authentication operations with Azure AD B2C. To do this, let’s go to the Azure AD B2C instance and select the “App registration” tab from the left menu. Then, let’s click on “New registration” and proceed with the configuration as shown below.
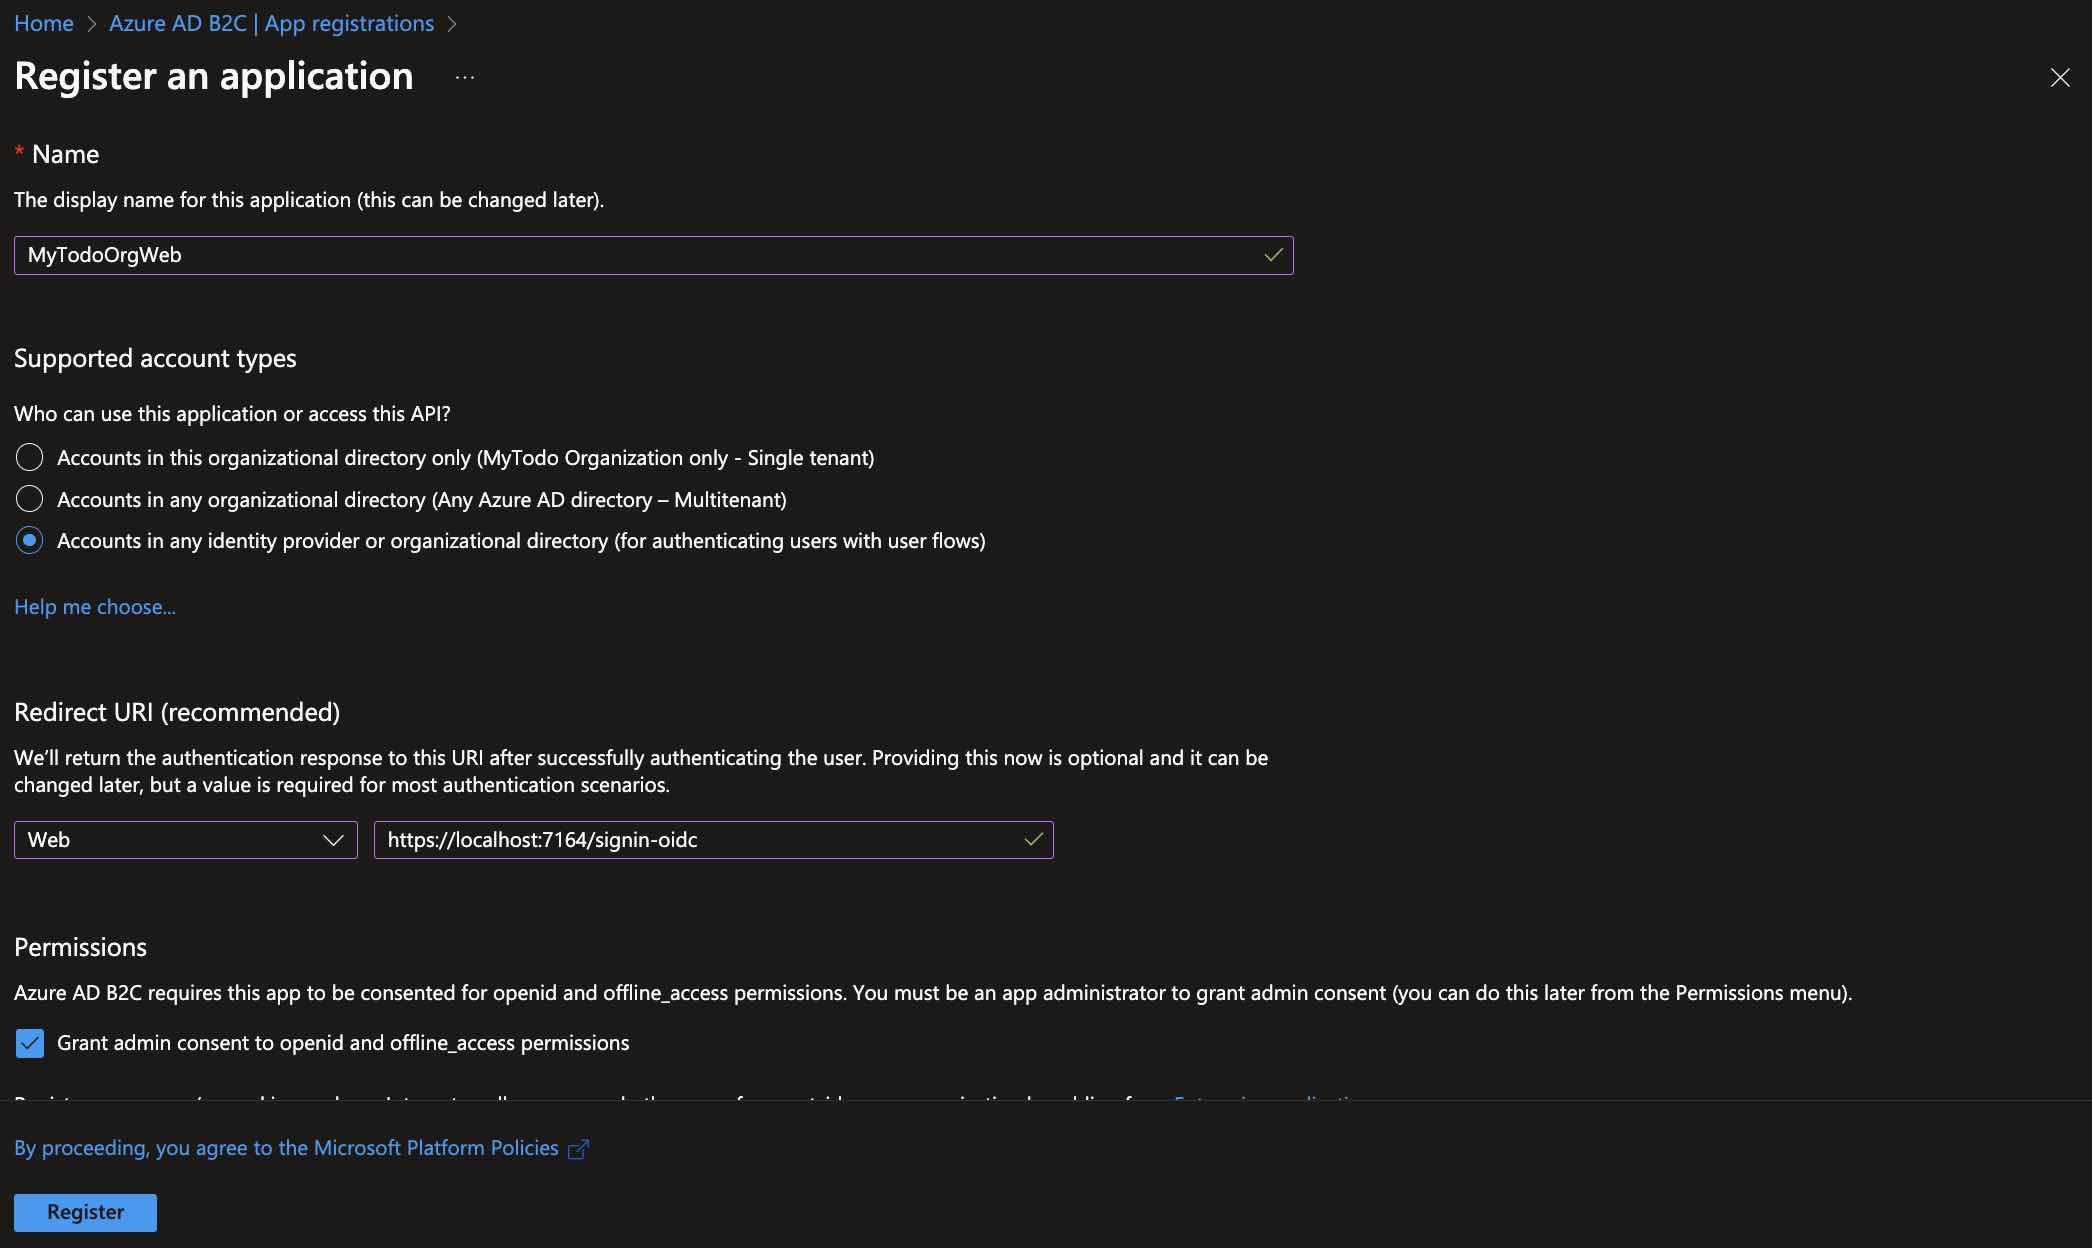
Let’s call it “MyTodoOrgWeb”, and for the “Supported account types” choose the last option. As for the “Redirect URI“, specify the default “signin-oidc” callback address that comes with the sample project template that we have created via .NET CLI.
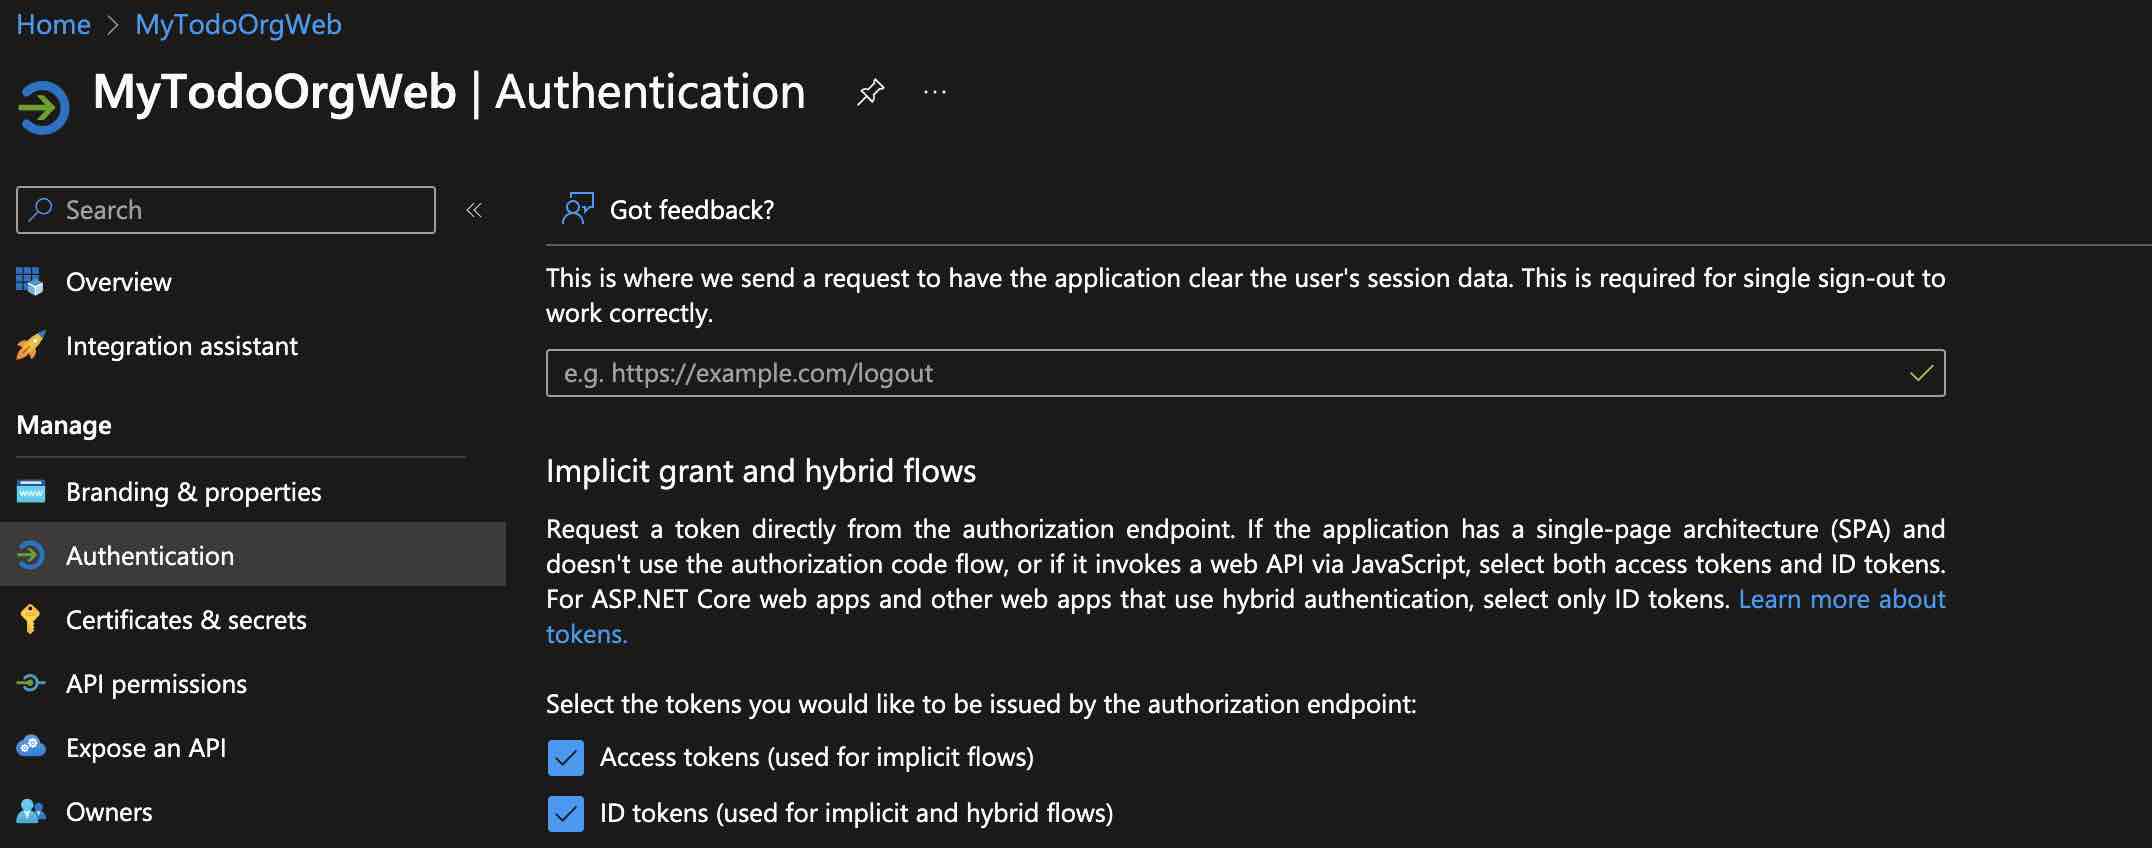
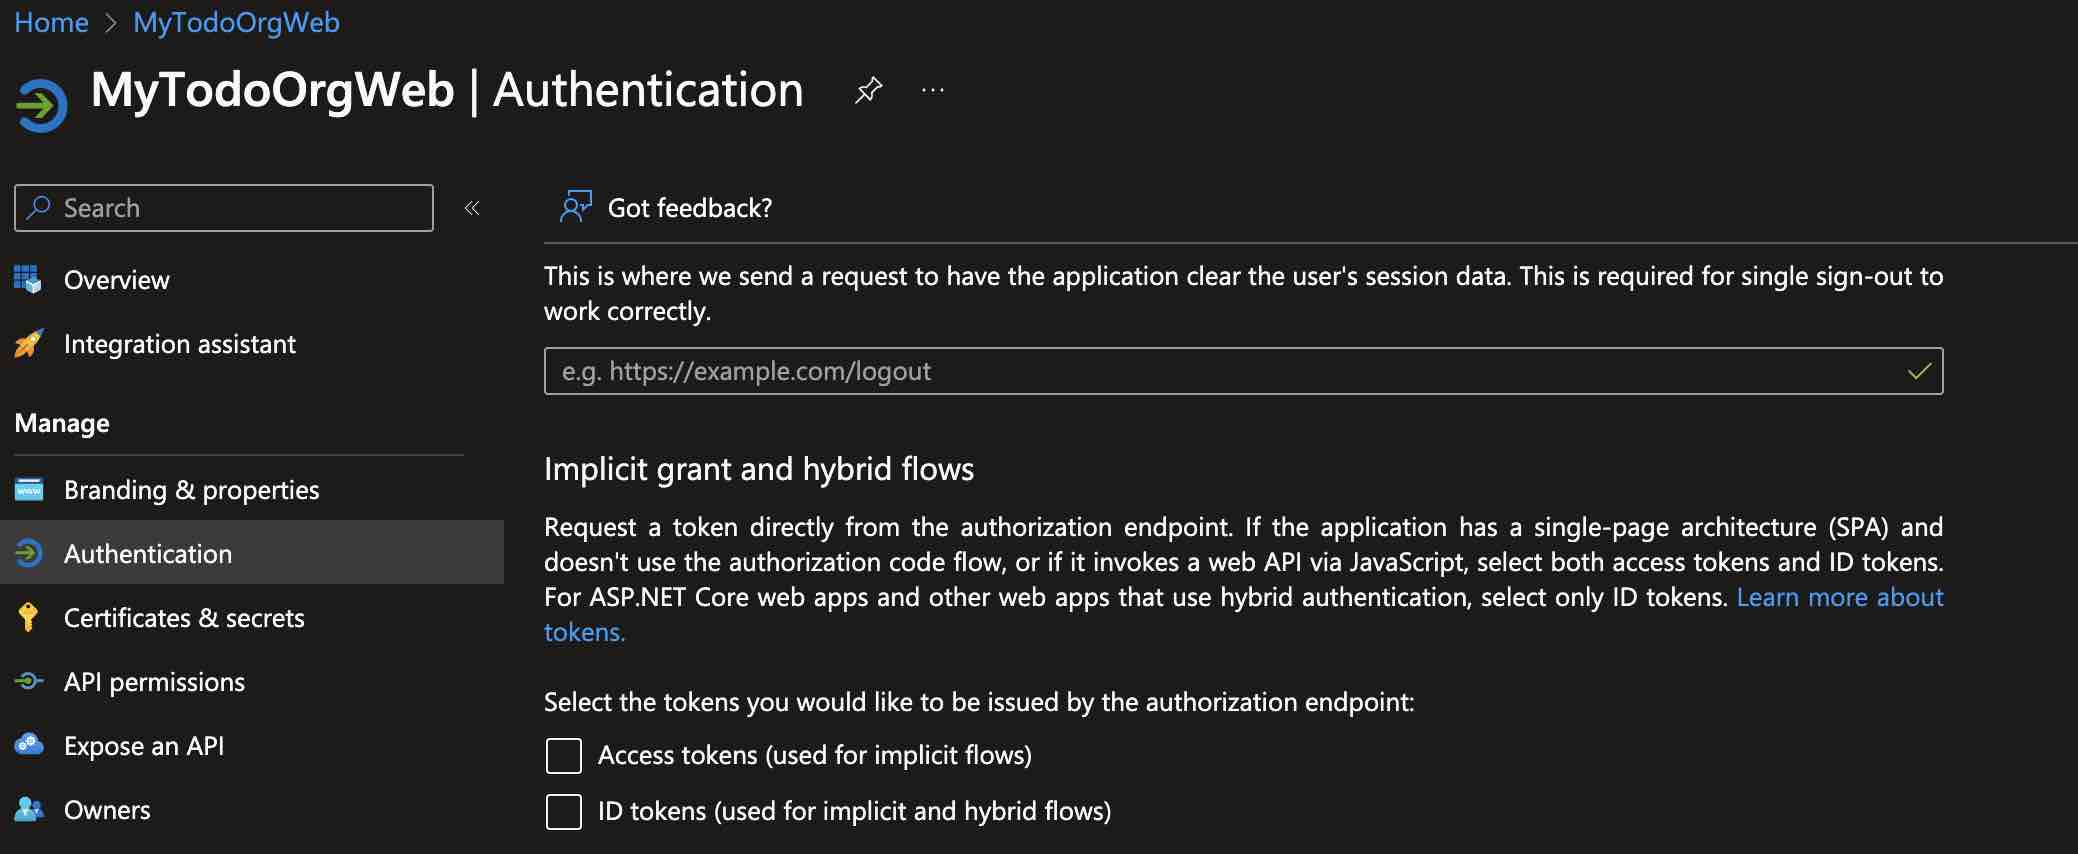
After completing the app registration process, let’s go to the “Authentication” tab. For quickly implementing the sign in process with OpenID Connect, let’s enable the implicit grant flow for now by selecting the “Access tokens” and “ID tokens” options. However, when we come to the point where we need to perform a Web API call, we will disable the implicit grant flow and instead enable the authorization code flow for better security. This is because in the implicit grant flow, the relevant tokens are transmitted in the query parameters of URLs during redirects, so it poses risks of being easily intercepted.
Then, let’s go to the “Certificates & secrets” tab and define a client secret. This secret will be used by “MyTodoOrgWeb” to securely consume the Web API, that we will create soon,
Now we can perform a quick test.
First, let’s update the “appsettings.json” file of the “MyTodoOrgWeb” application with the information we have created as follows.
{
  "AzureAdB2C": {
    "Instance": "https://YOUR_ORGANIZATION.b2clogin.com/",
    "ClientId": "CLIENT_ID",
    "CallbackPath": "/signin-oidc",
    "Domain": "YOUR_ORGANIZATION.onmicrosoft.com",
    "SignedOutCallbackPath": "/signout/B2C_1_CreateUserFlow",
    "SignUpSignInPolicyId": "B2C_1_CreateUserFlow",
    "ClientSecret": "YOUR_CLIENT_SECRET"
  },
  "Logging": {
    "LogLevel": {
      "Default": "Information",
      "Microsoft.AspNetCore": "Warning"
    }
  },
  "AllowedHosts": "*"
}
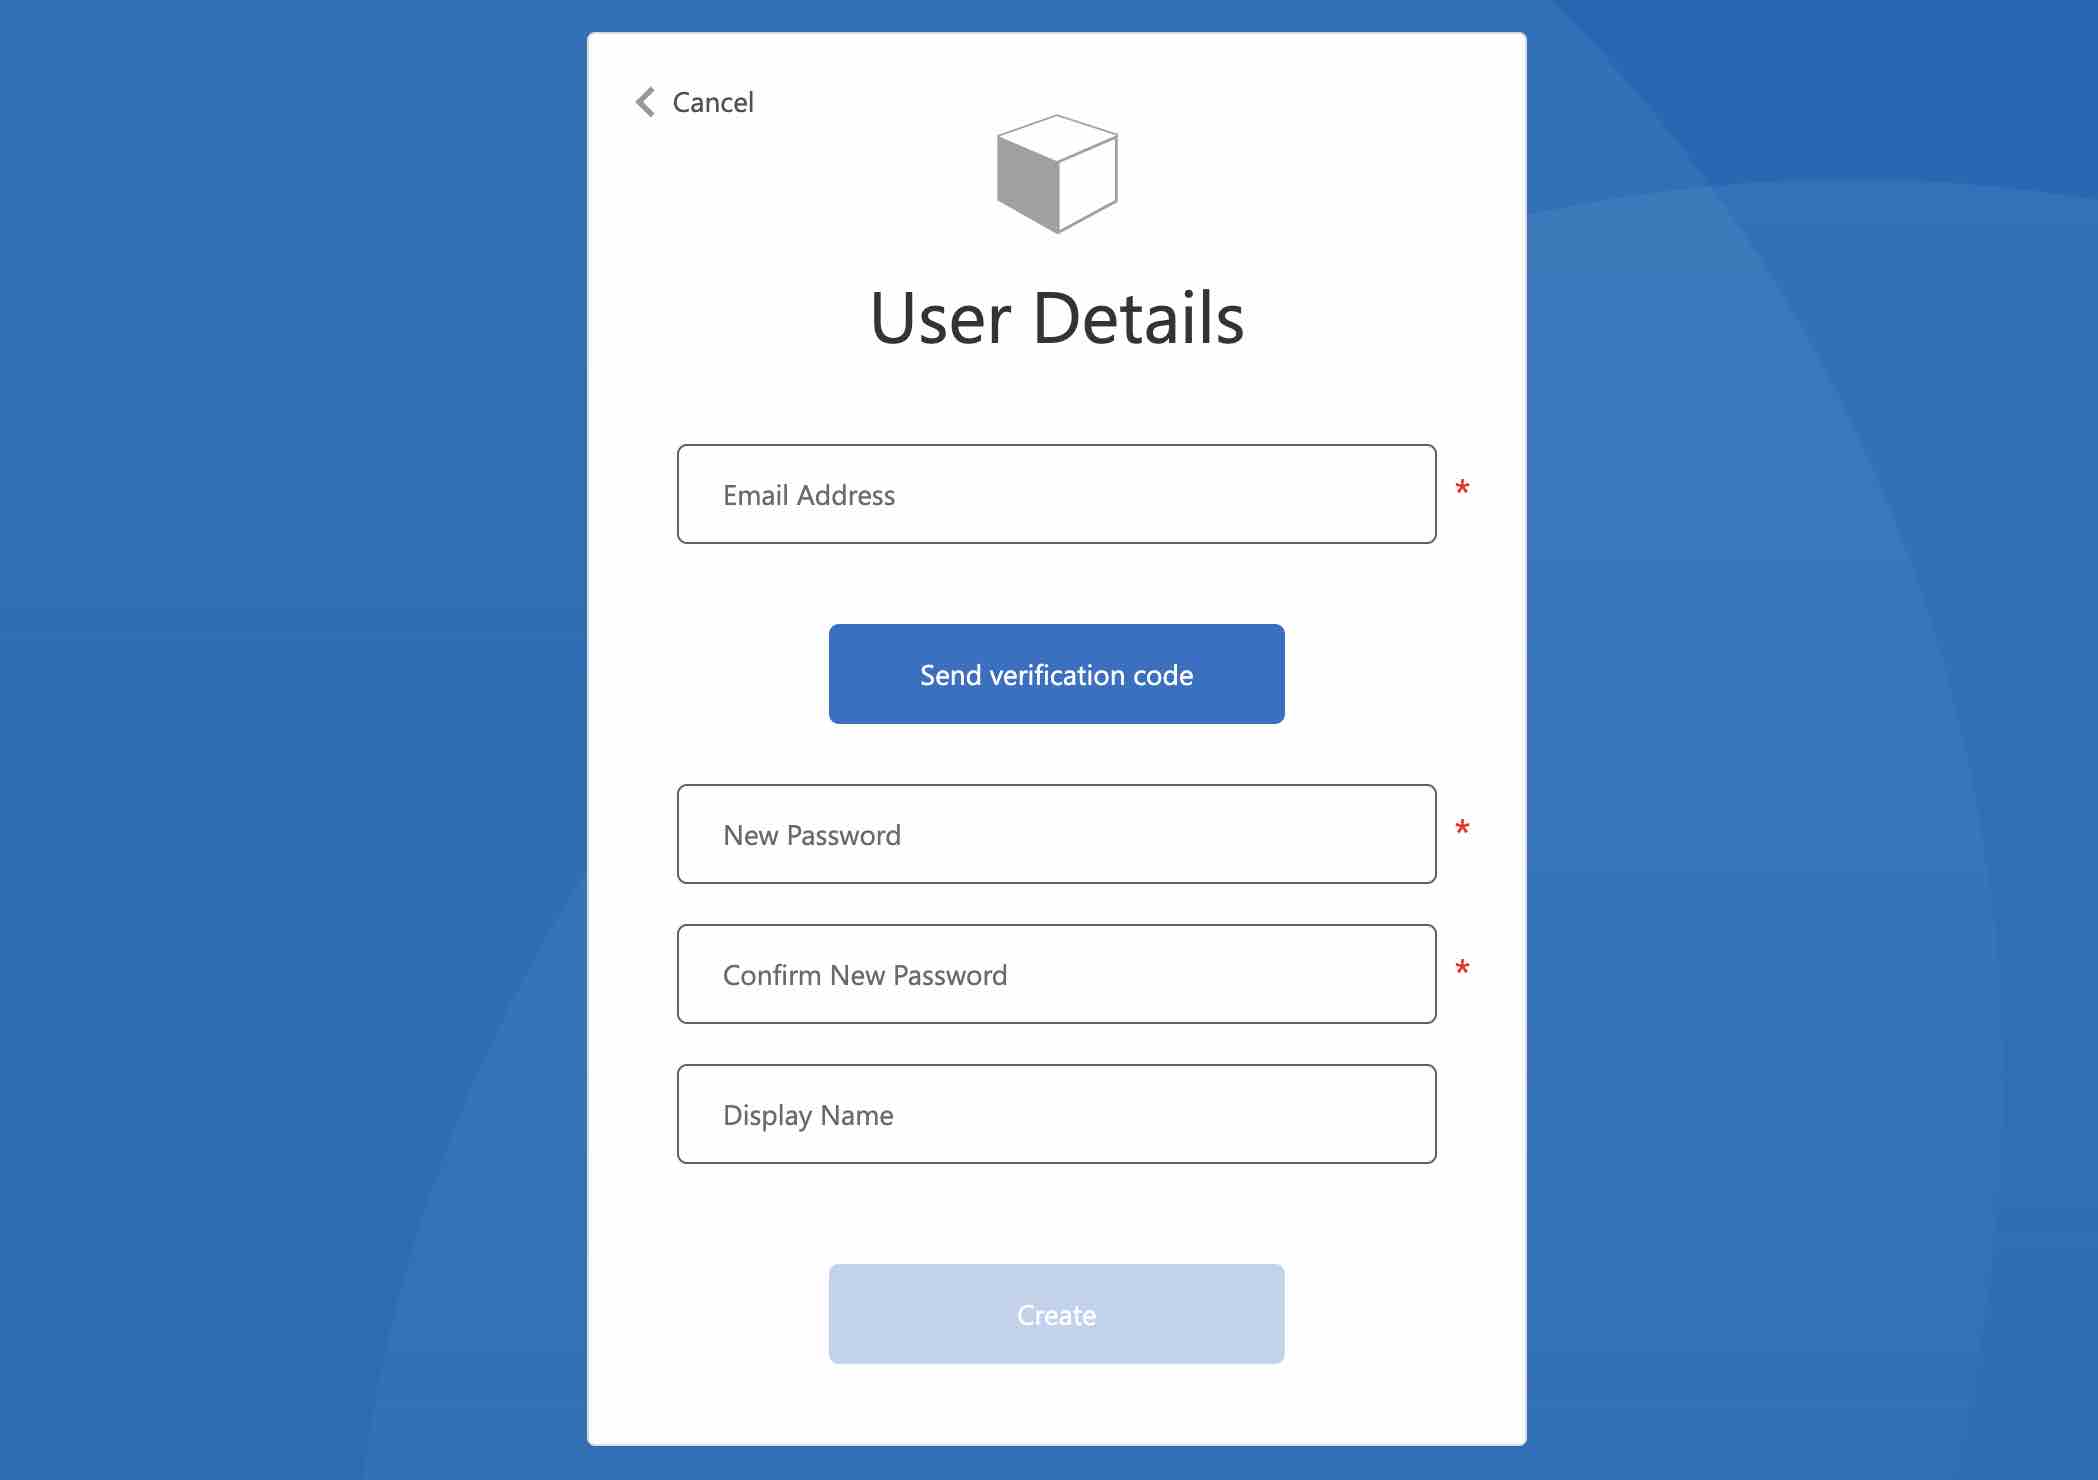
Then run the “MyTodoOrgWeb” application and click on the “Sign in” button.
At this point, if we look at the URL of the “Sign up and sign in” user flow that we got directed to, we can see that the “response_type=id_token” query parameter is set. This means that, as a result of the sign in process, we will obtain an “id_token” here.
As we can see, with the Web App template generated by .NET CLI and by using Azure AD B2C user flows, we have easily and quickly achieved sign up and sign in capabilities.
Now, let’s take a look at how we can access a Web API that has been secured with Azure AD B2C through this Web App.
Let’s Create a Web API
Once again, let’s create a sample .NET 7 Web API project named “MyTodoOrgAPI” using the .NET CLI.
dotnet new webapi -n MyTodoOrgAPI --auth IndividualB2C
The .NET CLI will once again create an API template for us, using Azure AD B2C for authentication and authorization processes.
Then, let’s perform the configuration within the tenant, as we did before, before starting the configuration for the project.
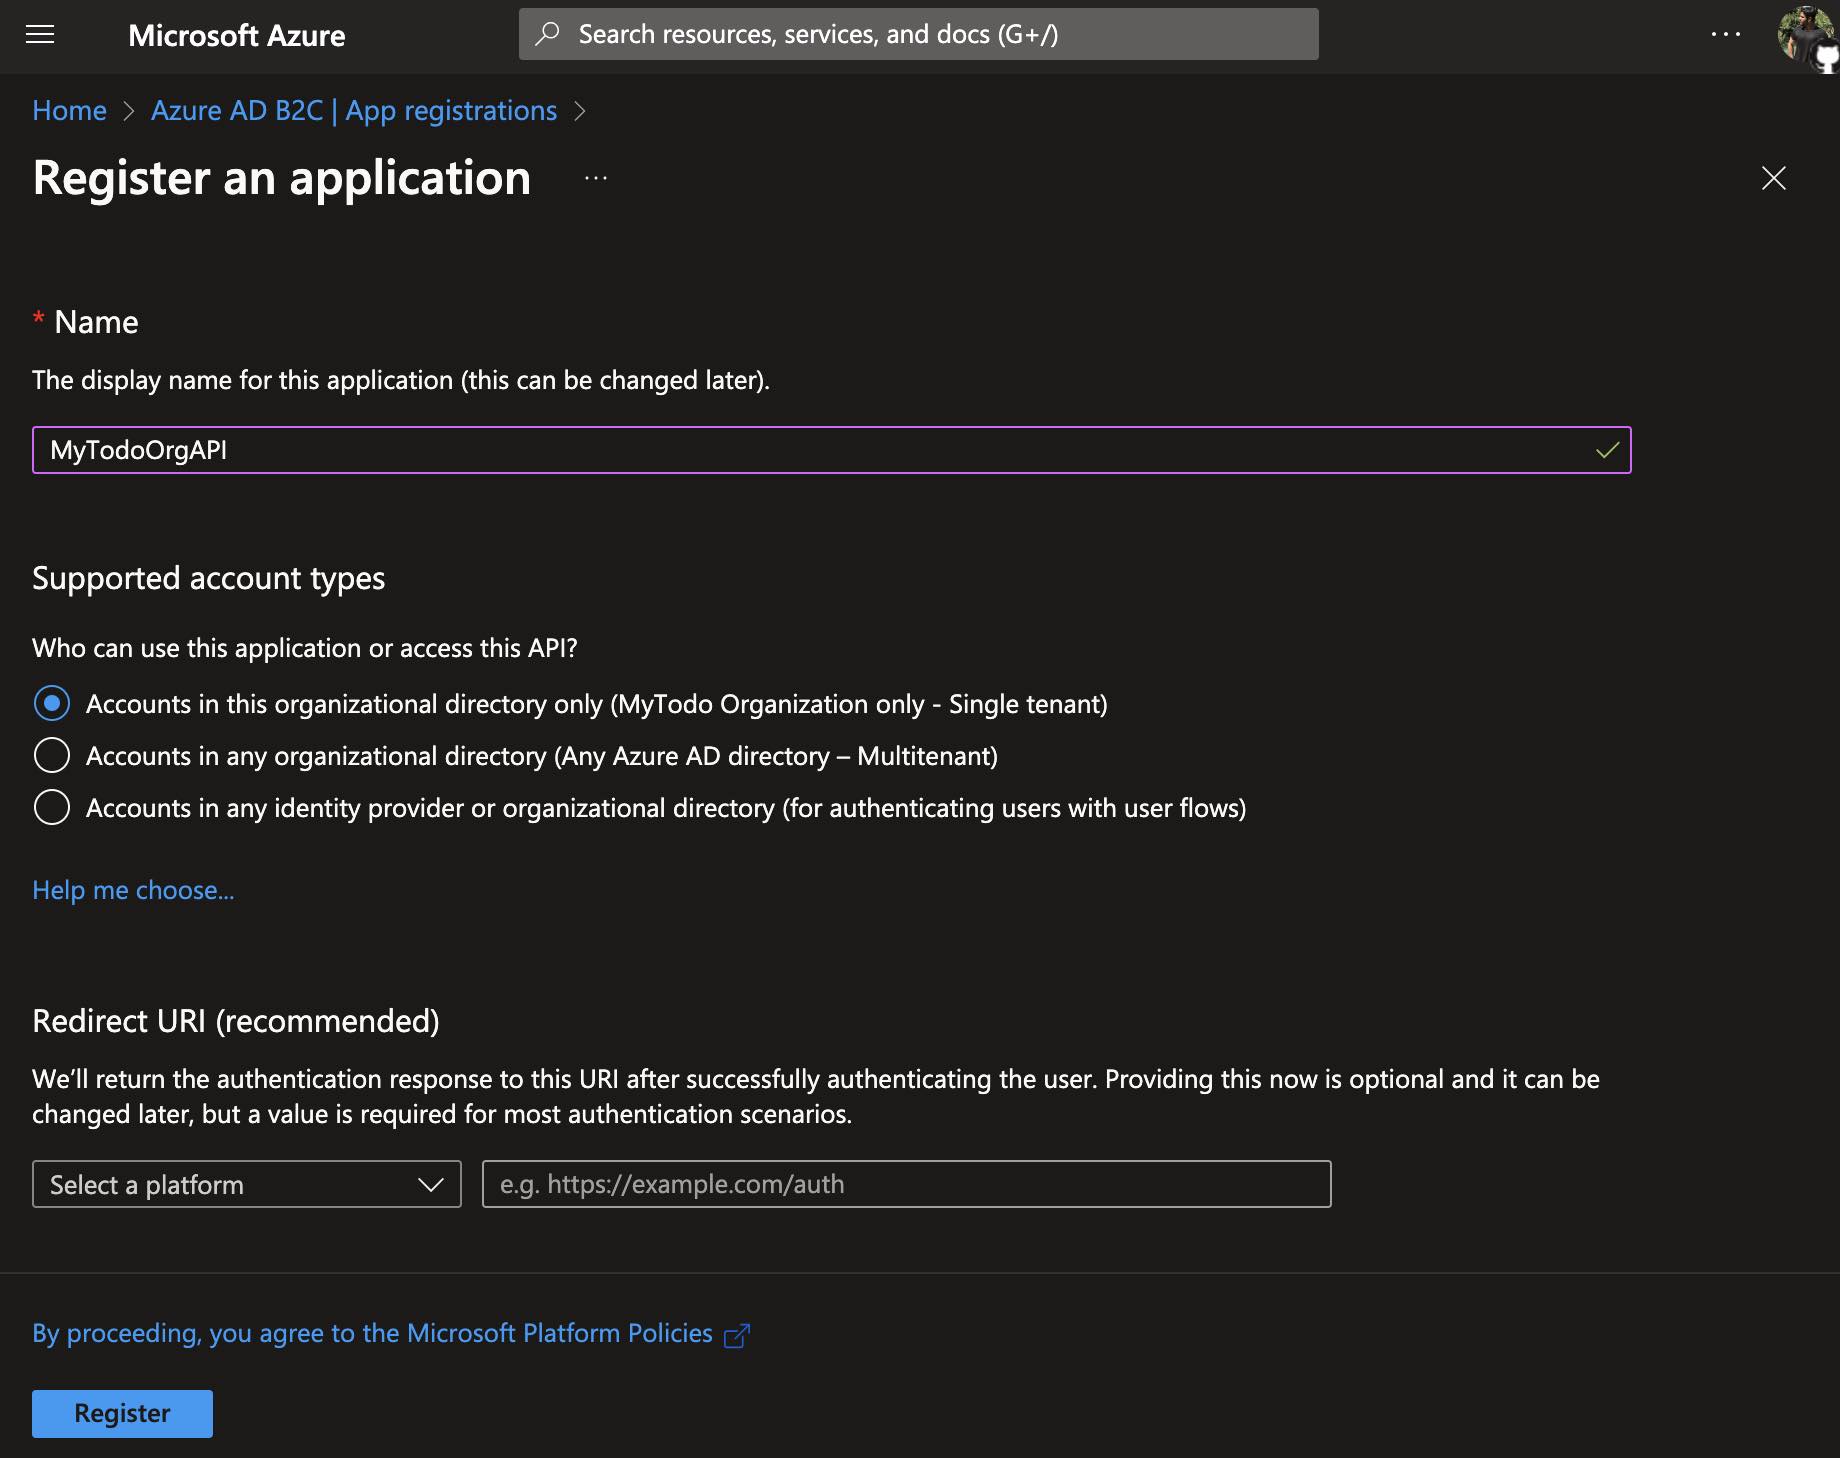
This time, let’s choose the option “Accounts in this organizational directory only…” for the “Supported account types“.
After completing the app registration process, we will now leverage scopes to achieve fine-grained access control on this API. Scopes allow us to restrict access to different endpoints or functionalities of an API on a per-client basis.
To do this, let’s first switch to the “Expose an API” tab and edit the “Application ID URI“, which will be used as a prefix for scopes. I have set the value to “mytodoorgapi” Next, let’s click on the “Add a scope” button and add an example scope named “read” as follows.
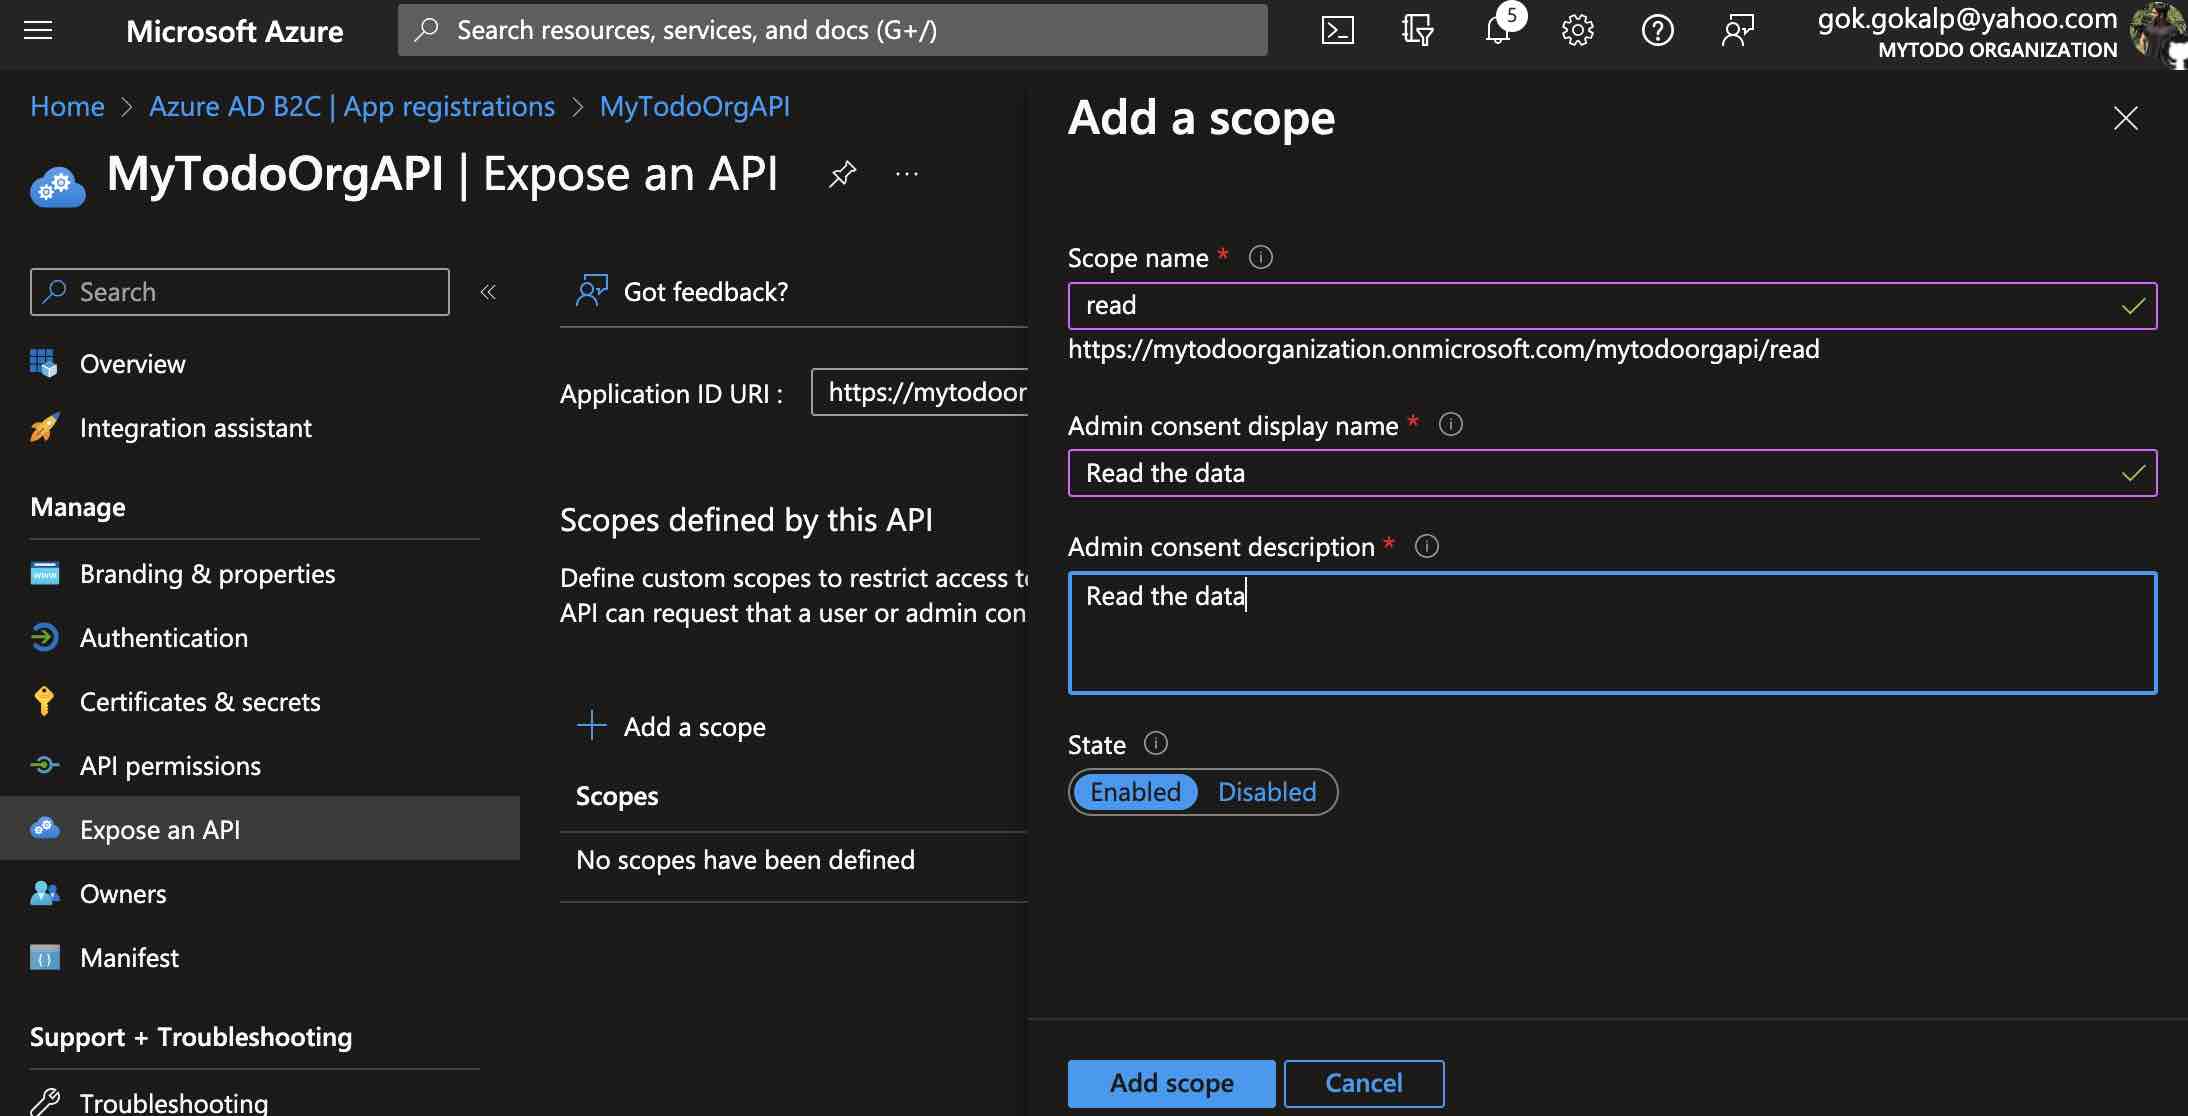
In short, the client that will call this API on behalf of the user is expected to have the “read” scope.
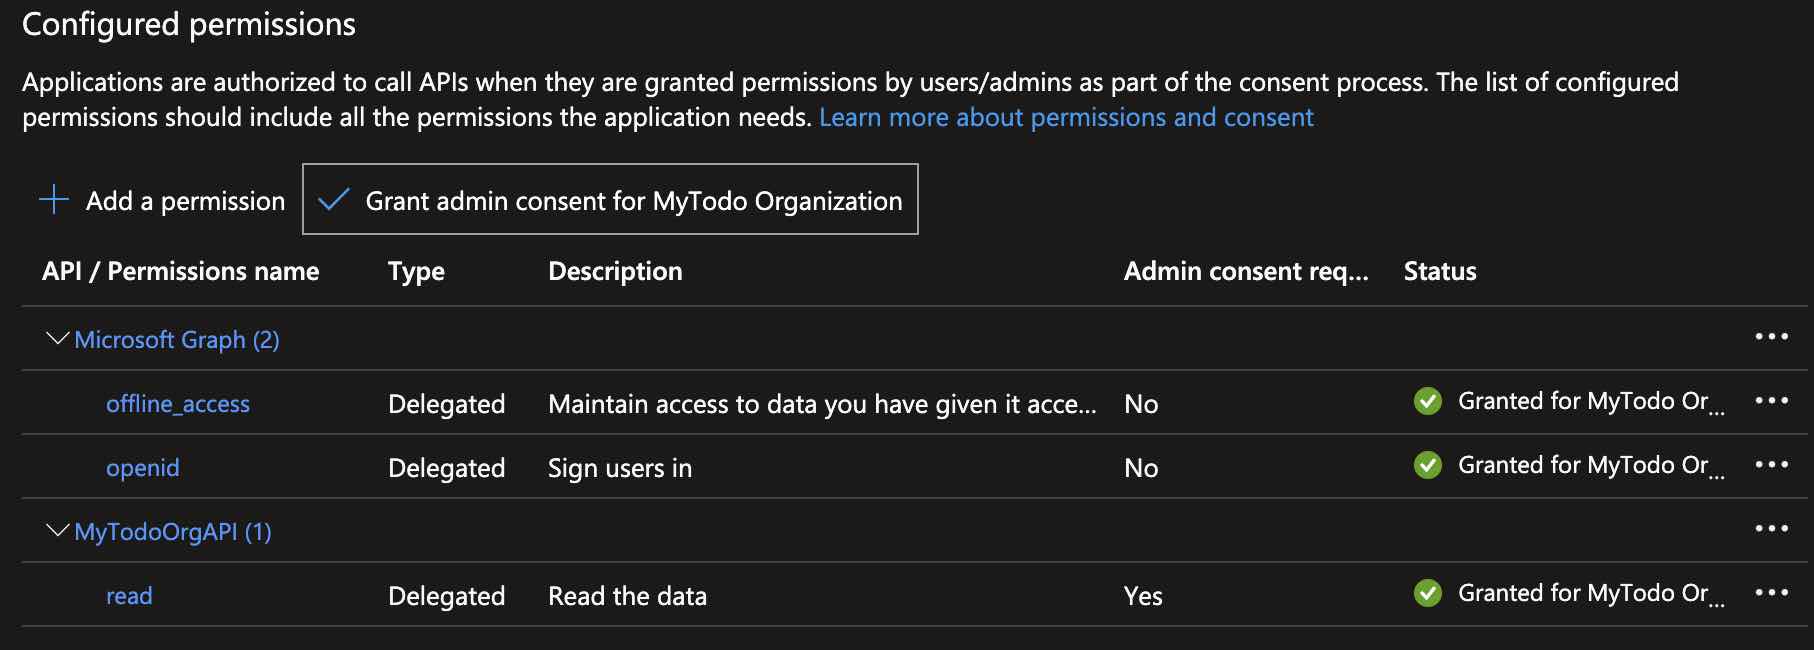
Therefore, to allow “MyTodoOrgWeb” to access “MyTodoOrgAPI“, we need to grant access to the defined scope. To do this, let’s go to the “MyTodoOrgWeb” application in Azure AD B2C, and navigate to the “API permissions” tab. Then, click on the “Add permission” button and let’s find the API we defined under the “APIs my organization uses” section, then select the “read” scope.
After adding access permission for the “read” scope, the last step is to grant “Admin consent“. In short, to enable “MyTodoOrgWeb” to directly access “MyTodoOrgAPI“, we need to give the “Admin consent“.
Thus, we have completed all the configurations on Azure AD B2C for both applications.
Now, let’s first make some code changes for “MyTodoOrgAPI“. Also, let’s use the default “WeatherForecast” example that comes with the template just by updating the “Route” and “RequiredScope” attributes within the controller as follows.
[Route("weatherforecasts")]
[RequiredScope("read")]
This way, a client with the “read” scope can access the endpoints under this controller. In addition to this, when we look into the “Program.cs“, we can see that the API comes ready with authentication middleware.
Next, let’s update the “appsettings.json” configuration file for the API based on the information we created earlier.
{
  "AzureAdB2C": {
    "Instance": "https://YOUR_ORGANIZATION.b2clogin.com/",
    "ClientId": "CLIENT_ID",
    "Domain": "YOUR_ORGANIZATION.onmicrosoft.com",
    "Scopes": "read",
    "SignUpSignInPolicyId": "B2C_1_CreateUserFlow"
  },
  "Logging": {
    "LogLevel": {
      "Default": "Information",
      "Microsoft.AspNetCore": "Warning"
    }
  },
  "AllowedHosts": "*"
}
Now, “MyTodoOrgAPI” is ready to use Azure AD B2C authentication.
Now, let’s make some code changes on “MyTodoOrgWeb“. First, let’s get the “WeatherForecast” class, that comes with the “MyTodoOrgAPI” template, and have it in “MyTodoOrgWeb” as it is. Then, let’s update the “Index.cshtml” file under the “Pages” folder of “MyTodoOrgWeb” as follows.
@page
@model IndexModel
@using Microsoft.Identity.Web
@using System.Net.Http.Headers

@inject ITokenAcquisition _tokenAcquisition
@inject IHttpClientFactory _clientFactory

@{
    ViewData["Title"] = "Home page";

    async Task<List<WeatherForecast>> GetWeatherForecastAsync()
    {
        var requiredScopeForMyTodoOrgAPI = "https://mytodoorganization.onmicrosoft.com/mytodoorgapi/read";
        var accessToken = await _tokenAcquisition.GetAccessTokenForUserAsync(scopes: new[] { requiredScopeForMyTodoOrgAPI }, user: User);


        string baseAddress = "http://localhost:5076";
        string route = "weatherforecasts";

        var client = _clientFactory.CreateClient();
        client.BaseAddress = new Uri(baseAddress);
        client.DefaultRequestHeaders.Authorization = new AuthenticationHeaderValue("Bearer", accessToken);
        client.DefaultRequestHeaders.Accept.Add(new MediaTypeWithQualityHeaderValue("application/json"));

        var response = await client.GetAsync(route);

        if (response.IsSuccessStatusCode)
        {
            return await response.Content.ReadFromJsonAsync<List<WeatherForecast>>();
        }

        throw new Exception(response.ReasonPhrase);
    }
}

@if (User.Identity?.IsAuthenticated == true)
{
    List<WeatherForecast> weatherForecasts = await GetWeatherForecastAsync();

    <ul>
        @foreach (var weatherForecast in weatherForecasts)
        {
            <li>Date: @weatherForecast.Date.ToShortDateString()</li>
            <li>Summary: @weatherForecast.Summary</li>
            <li>Temperature: @weatherForecast.TemperatureC</li>
        }
    </ul>
}
Within the “GetWeatherForecastAsync” method, to securely call the “MyTodoOrgAPI” on behalf of a signed-in user, we make use of the “ITokenAcquisition” service that comes with the “Microsoft.Identity.Web” authentication library. This service automatically handles the process of acquiring an access token for us.
This service also performs operations such as cache management for the relevant access token to enhance the application’s performance and refresh the access token to keep the user session valid.
NOTE: Don’t forget to replace the “baseAddress” variable in your own environment with the address of your local “MyTodoOrgAPI”.
Now, let’s go to the “Program.cs” file in “MyTodoOrgWeb” and enable the “ITokenAcquisition” service by injecting the “EnableTokenAcquisitionToCallDownstreamApi” method after the “AddMicrosoftIdentityWebApp” line. Additionally, let’s activate the in-memory token cache feature for testing purposes. For production environments, we can use the distributed cache feature.
// Add services to the container.
builder.Services.AddAuthentication(OpenIdConnectDefaults.AuthenticationScheme)
    .AddMicrosoftIdentityWebApp(builder.Configuration.GetSection(Constants.AzureAdB2C))
    .EnableTokenAcquisitionToCallDownstreamApi()
    .AddDistributedTokenCaches();
The “ITokenAcquisition” service enables the authorization code flow on the Web App side by default. Of course, we could have activated the authorization code flow on the “MyTodoOrgWeb” side without using this service. In the previous step, we used the implicit grant flow because we didn’t have an API and wanted to easily perform sign-in processes. In short, we could have activated the authorization code flow on the Web App side by having the below OpenID Connect configuration.
services.Configure(OpenIdConnectDefaults.AuthenticationScheme, options =>
{
   options.ResponseType = "code";
});
Therefore, now we need to disable the implicit flow that we enabled for the “MyTodoOrgWeb” application on Azure AD B2C. We can easily perform this by disabling both options as shown below.
Now, during sign-in processes, the Web App obtains an authorization code, and this code is used on the backend side through the “ITokenAcquisition” service to obtain an access token.
Now, let’s run both applications and navigate back to the sign-in page of “MyTodoOrgWeb“. In the URL of the user flow we get redirected to, we can see that this time the “response_type” is set to “code“.
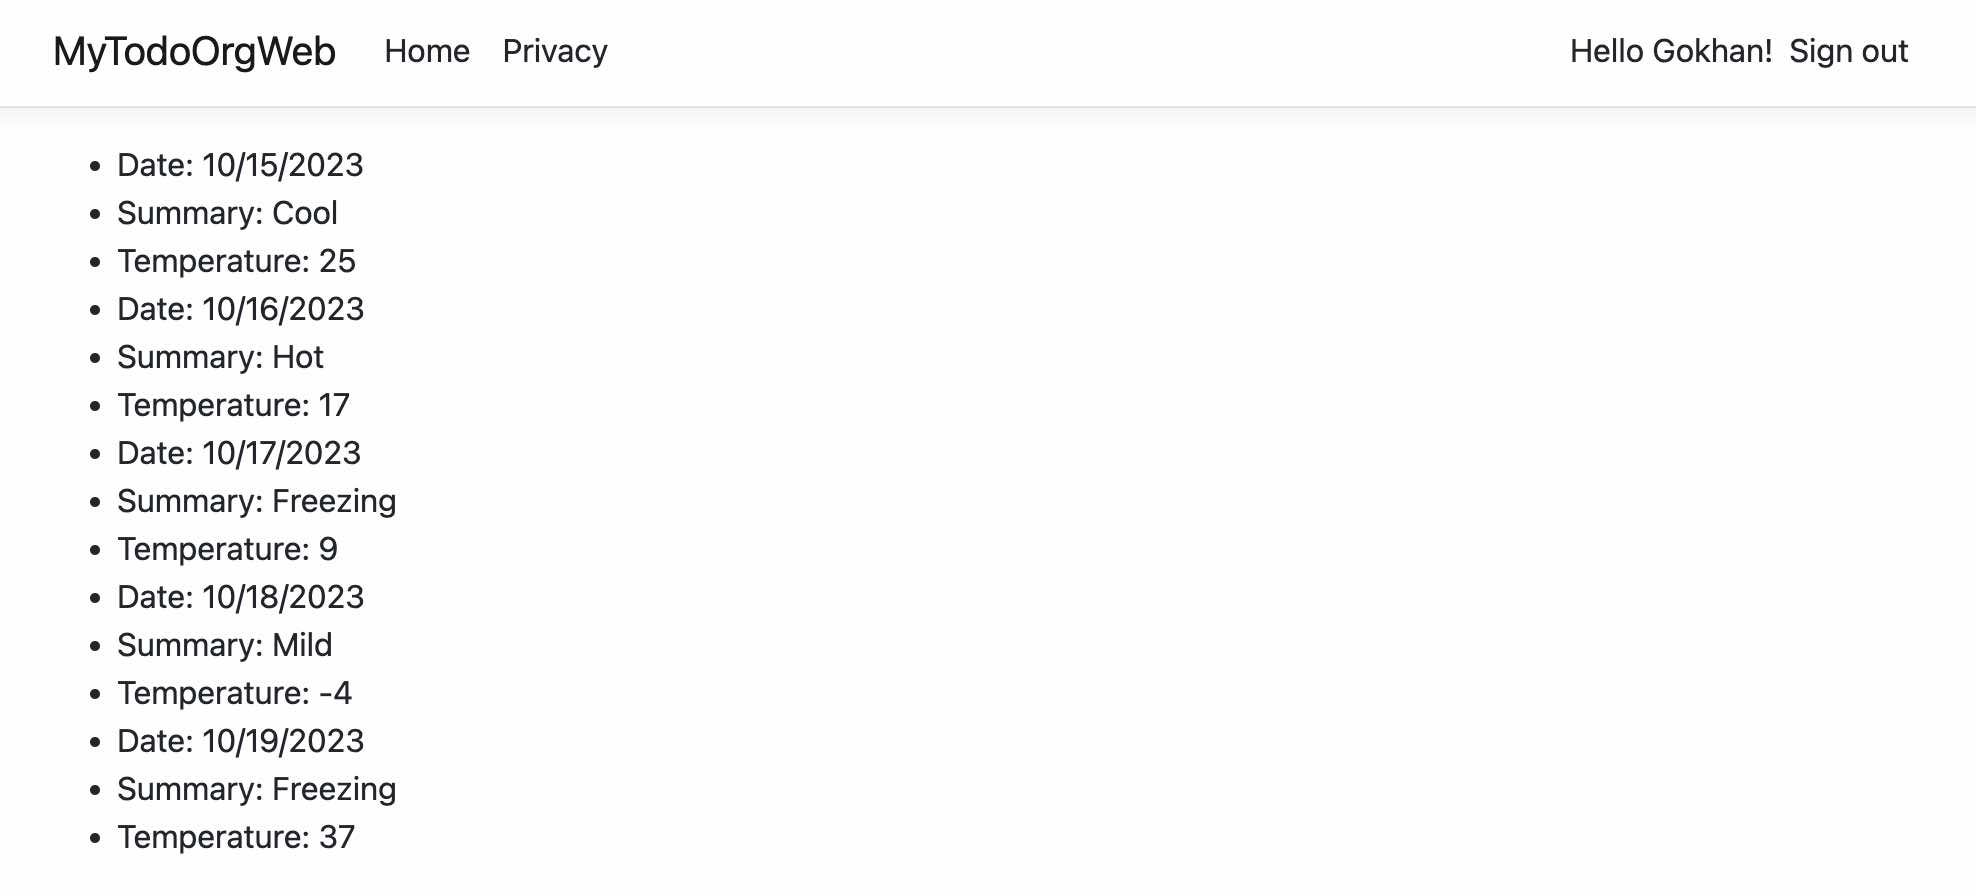
After the sign-in process, we can see that “MyTodoOrgWeb” successfully consumes the “MyTodoOrgAPI” by obtaining a valid access token on behalf of the authenticated user. At the “MyTodoOrgAPI” side, the relevant bearer token along with the scope gets validated, and then the relevant operation gets performed.
References
https://learn.microsoft.com/en-us/azure/active-directory-b2c/enable-authentication-web-api?tabs=csharpclient
https://learn.microsoft.com/en-us/azure/active-directory-b2c/enable-authentication-web-application?tabs=visual-studio
https://learn.microsoft.com/en-us/entra/identity-platform/v2-oauth2-auth-code-flow
Be First to Comment