Merhaba arkadaşlar.
ASP.NET Core serisine aslında uzun bir süredir giriş yapmayı düşünüyordum fakat, bir türlü fırsat bulamamıştım. 🙂 Son dönemlerde doğan bazı ihtiyaçlarımızdan dolayı (kolayca dockerize edebilmek vb.), bu aralar aktif olarak ASP.NET Core üzerinde development yapmaktayım. Bu sebep ile ara ara seriler halinde ASP.NET Core üzerine irili ufaklı makaleler yazmaya çalışacağım.
Bu makale kapsamında ASP.NET Core ile lightweight bir RESTful API geliştireceğiz. Bunun için data işlemlerinde Dapper ve Repository pattern’ını kullanıp, global exception’ları ise Serilog ile handle edeceğiz. Geliştirmenin ardından ise bir Swagger arayüzü ekleyip, Azure App Services üzerine nasıl deploy edebiliriz gibi işlemleri gerçekleştirmeye çalışacağız.
Proje Structure’ını Oluşturma
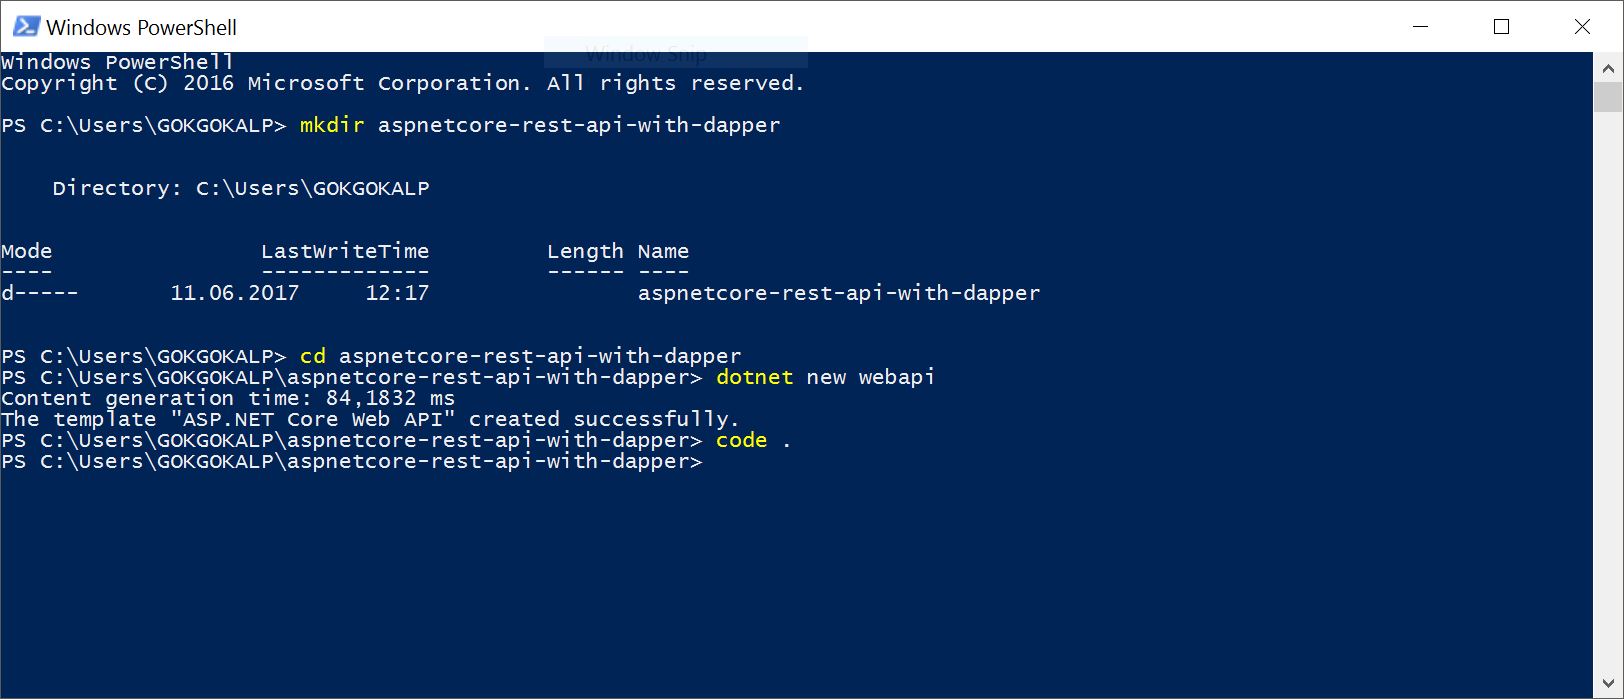
Öncelikle PowerShell üzerinden “aspnetcore-rest-api-with-dapper” isminde bir folder oluşturarak, aşağıdaki gibi “dotnet new webapi” komutu ile bir ASP.NET Core Web API projesi oluşturalım. Ardından “code .” komutu ile Visual Studio Code içerisinde projenin açılmasını sağlayalım.
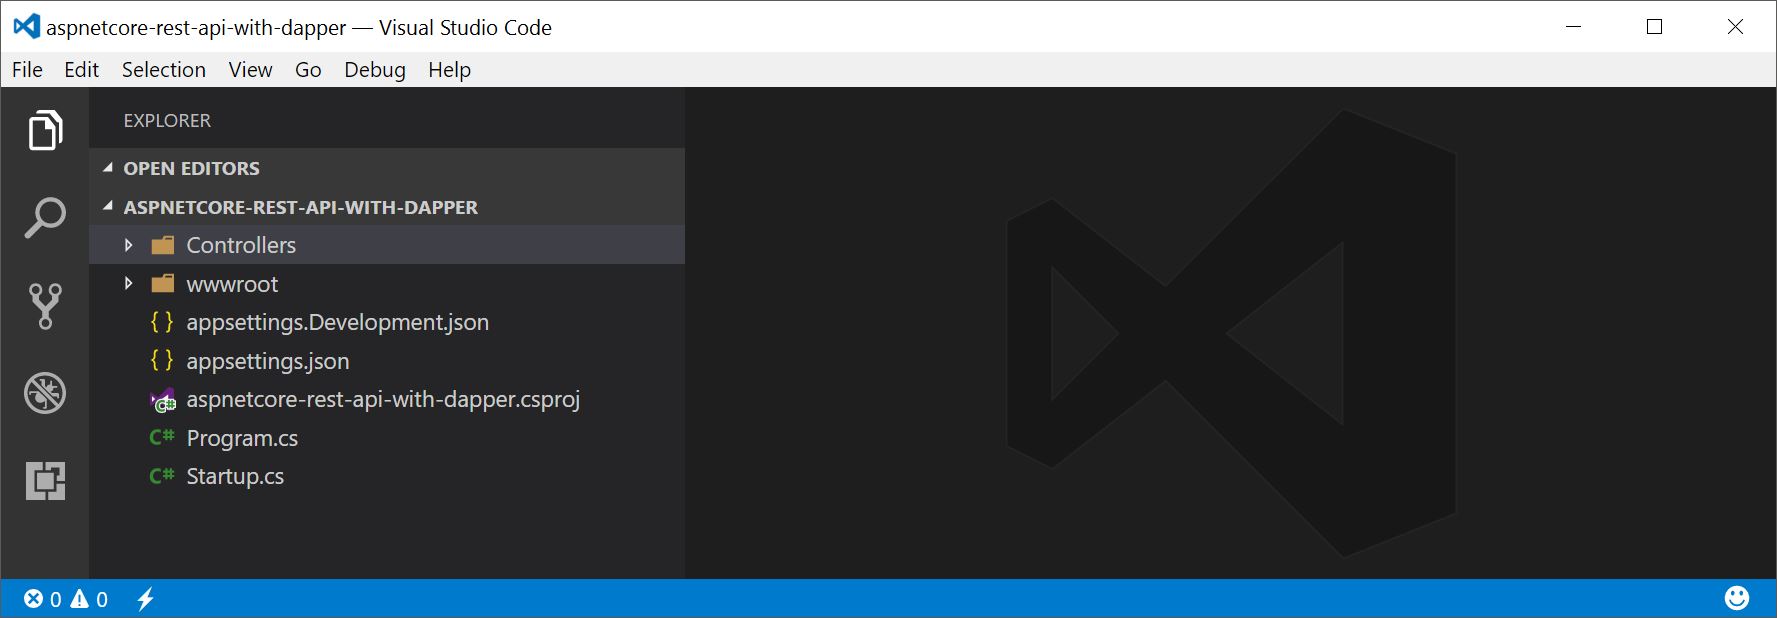
Bu işlemin ardından template, aşağıdaki gibi Visual Studio Code içerisinde açılacaktır.
Artık kodlamaya yavaş yavaş başlayabiliriz.
Model Tanımlama
Bir e-ticaret sitesi geliştirdiğimizi düşünelim ve ürünlerimizi yönetecek bir RESTful API tasarlamak istiyoruz. Öncelikle proje içerisinde “Models” isminde bir folder oluşturalım ve içerisine “Product” class’ını aşağıdaki gibi tanımlayalım.
using System;

namespace aspnetcore_rest_api_with_dapper.Models
{
    public class Product
    {
        public long Id { get; set; }
        public long CategoryId { get; set; }

        public string Name { get; set; }
        public string Description { get; set; }
        public double Price { get; set; }
        public DateTime CreatedDate { get; set; }
    }
}
Sql create script’i ise:
USE [RESTfulSampleDb]
GO

CREATE TABLE [dbo].[Products](
	[Id] [bigint] IDENTITY(1,1) NOT NULL,
	[CategoryId] [bigint] NULL,
	[Name] [nvarchar](50) NOT NULL,
	[Description] [nvarchar](max) NOT NULL,
	[Price] [decimal](18, 2) NOT NULL,
	[CreatedDate] [datetime2] NOT NULL,
 CONSTRAINT [PK_Products] PRIMARY KEY CLUSTERED
(
	[Id] ASC
)WITH (PAD_INDEX = OFF, STATISTICS_NORECOMPUTE = OFF, IGNORE_DUP_KEY = OFF, ALLOW_ROW_LOCKS = ON, ALLOW_PAGE_LOCKS = ON) ON [PRIMARY]
) ON [PRIMARY] TEXTIMAGE_ON [PRIMARY]
Contract Tanımlama
Request ve Response objelerini tanımlayabilmek için “Contracts” isminde yeni bir folder daha oluşturalım. API üzerinden sisteme yeni bir product eklenmek isteneceği zaman kullanacak olacağımız “ProductRequest” objesini aşağıdaki gibi tanımlı olsun.
using System;
using System.Collections.Generic;

namespace aspnetcore_rest_api_with_dapper.Contracts
{
    public class ProductRequest
    {
        public long CategoryId { get; set; }

        public string Name { get; set; }
        public string Description { get; set; }
        public double Price { get; set; }
    }
}
Bu işlemin ardından, API üzerinden dışarıya response olarak döneceğimiz “ProductResponse” objesini de aşağıdaki gibi tanımlayalım.
using System;
using System.Collections.Generic;
using aspnetcore_rest_api_with_dapper.Models;
using Newtonsoft.Json;

namespace aspnetcore_rest_api_with_dapper.Contracts
{
    public class ProductResponse
    {
        public ProductResponse()
        {
             Products = new List<Product>();
        }

        [JsonProperty(NullValueHandling = NullValueHandling.Ignore)]
        public string Message { get; set; }

        public List<Product> Products { get; set; }
    }
}
Buradaki “Message” property’sini istenilen product’ın bulunamadığı durumlarda, bulunamadı bilgisini response olarak dönebilmek için kullanacağız. Eğer “Message” property’sine herhangi bir bilgi set etmez isek, eklemiş olduğumuz “[JsonProperty]” attribute’ü ile serialize işlemleri sırasında bu property, ignore edilecektir.
Controller’ı Oluşturma
Gerekli olan common objeleri tanımlamamızın ardından, artık sırasıyla “Controller > Business > Data” şeklinde kodlamaya ve implemente etmeye başlayabiliriz. İlk olarak “Controllers” folder’ı içerisinde, “ProductsController” isminde yeni bir controller oluşturalım ve aşağıdaki gibi kodlayalım.
using System;
using System.Collections.Generic;
using System.Linq;
using System.Threading.Tasks;
using aspnetcore_rest_api_with_dapper.Business;
using aspnetcore_rest_api_with_dapper.Contracts;
using aspnetcore_rest_api_with_dapper.Data;
using aspnetcore_rest_api_with_dapper.Models;
using Microsoft.AspNetCore.Mvc;

namespace aspnetcore_rest_api_with_dapper.Controllers
{
    [Route("api/v1/[controller]")]
    public class ProductsController : Controller
    {
        private readonly IProductBusiness _productBusiness;

        public ProductsController(IProductBusiness productBusiness)
        {
            _productBusiness = productBusiness;
        }

        // GET api/v1/products/{id}
        [HttpGet("{id}")]
        public async Task<ProductResponse> Get(long id)
        {
            return await _productBusiness.GetAsync(id);
        }

        // GET api/v1/products
        [HttpGet]
        public async Task<ProductResponse> Get()
        {
            return await _productBusiness.GetAllAsync();
        }

        // POST api/v1/products
        [ProducesResponseType(201)]
        [HttpPost]
        public async Task Post([FromBody]ProductRequest productRequest)
        {
            await _productBusiness.AddAsync(productRequest);
        }
    }
}
Constructor üzerinden “IProductBusiness” olarak bir interface inject ettik ve ardından “GetAsync“, “GetAllAsync” ve “AddAsync” method’larının implementasyonunu, sırasıyla gerçekleştirdik. Bu noktadan itibaren daha iyi bir sistem performansı elde edebilmek için, task-based olarak ilerleyeceğiz.
İleride versiyonlama işlemlerini yapabilmek için ise, URL path’i “api/v1/products” şeklinde tanımladık.
Business’ı Oluşturma
Controller’ı kodlarken “IProductBusiness” interface’ini kullanmıştık. Şimdi “Business” isminde bir folder oluşturarak, içerisinde aşağıdaki gibi “IProductBusiness” interface’ini tanımlayalım.
using System;
using System.Collections.Generic;
using System.Threading.Tasks;
using aspnetcore_rest_api_with_dapper.Contracts;
using aspnetcore_rest_api_with_dapper.Models;

namespace aspnetcore_rest_api_with_dapper.Business
{
    public interface IProductBusiness
    {
        Task<ProductResponse> GetAsync(long id);
        Task<ProductResponse> GetAllAsync();
        Task AddAsync(ProductRequest productRequest);
    }
}
Buradaki Get method’larında response olarak, tanımladığımız “ProductResponse” class’ını kullanacağız. Şimdi “ProductBusiness” isminde bir class oluşturalım ve “IProductBusiness” interface’ini aşağıdaki gibi implemente edelim.
using System;
using System.Collections.Generic;
using System.Linq;
using System.Threading.Tasks;
using aspnetcore_rest_api_with_dapper.Contracts;
using aspnetcore_rest_api_with_dapper.Data;
using aspnetcore_rest_api_with_dapper.Models;

namespace aspnetcore_rest_api_with_dapper.Business
{
    public class ProductBusiness : IProductBusiness
    {
        private readonly IProductRepository _productRepository;

        public ProductBusiness(IProductRepository productRepository)
        {
            _productRepository = productRepository;
        }

        public async Task<ProductResponse> GetAsync(long id)
        {
            ProductResponse productResponse = new ProductResponse();
            var product = await _productRepository.GetAsync(id);

            if(product == null)
            {
                productResponse.Message = "Product not found.";
            }
            else
            {
                productResponse.Products.Add(product);
            }

            return productResponse;
        }

        public async Task<ProductResponse> GetAllAsync()
        {
            //TODO: Paging...

            ProductResponse productResponse = new ProductResponse();
            IEnumerable<Product> products = await _productRepository.GetAllAsync();

            if(products.ToList().Count == 0)
            {
                productResponse.Message = "Products not found.";
            }
            else
            {
                productResponse.Products.AddRange(products);
            }

            return productResponse;
        }

        public async Task AddAsync(ProductRequest productRequest)
        {
            Product product = new Product(){
                CategoryId = productRequest.CategoryId,
                Name = productRequest.Name,
                Description = productRequest.Description,
                Price = productRequest.Price
            };

            await _productRepository.AddAsync(product);
        }
    }
}
Bu noktada ise constructor üzerinden bir “IProductRepository” inject ediyoruz. Controller içerisinde olduğu gibi bu interface’in de “GetAsync“, “GetAllAsync” ve “AddAsync” method’larını yukarıdaki gibi implemente ediyoruz.
NOT: “GetAllAsync” method’unu implemente ederken, paging işlemini gerçekleştirmedik. Es geçmeyelim. 🙂
Data Kısmının Oluşturulması
Data işlemlerini gerçekleştirebilmek için burada, Repository pattern’ı ve Dapper‘ı kullanacağımızı belirtmiştik. Bunun için öncelikle aşağıdaki gibi Dapper’ı, projemize nuget üzerinden dahil edelim.
dotnet add package Dapper

Dapper’ın projeye dahil edilmesinden sonra, “Data” isminde yeni bir folder oluşturalım ve içerisinde ilk olarak “IProductRepository” interface’ini aşağıdaki gibi tanımlayalım.
using System;
using System.Collections.Generic;
using System.Threading.Tasks;
using aspnetcore_rest_api_with_dapper.Models;

namespace aspnetcore_rest_api_with_dapper.Data
{
    public interface IProductRepository
    {
        Task<Product> GetAsync(long id);
        Task<IEnumerable<Product>> GetAllAsync();
        Task AddAsync(Product product);
    }
}
Burada sadece örneğimiz gereği bazı method’ları tanımlayacağız. Bunlar ise “IProductBusiness” içerisinde kullanmış olduğumuz “GetAsync“, “GetAllAsync” ve “AddAsync” method’ları olacak. Implemente edebilmek için “ProductRepository” isminde yeni bir class tanımlayalım ve aşağıdaki gibi kodlayalım.
using System;
using System.Collections.Generic;
using System.Data;
using System.Data.SqlClient;
using System.Threading.Tasks;
using aspnetcore_rest_api_with_dapper.Models;
using Dapper;

namespace aspnetcore_rest_api_with_dapper.Data
{
    public class ProductRepository : IProductRepository
    {
        private readonly string _connectionString;
        private  IDbConnection _connection { get { return new SqlConnection(_connectionString); }}

        public ProductRepository()
        {
            // TODO: It will be refactored...
            _connectionString = "Server=DESKTOP-85SV1TI\\SQLEXPRESS;Database=RESTfulSampleDb;Trusted_Connection=True;MultipleActiveResultSets=true";
        }

        public async Task<Product> GetAsync(long id)
        {
            using (IDbConnection dbConnection = _connection)
            {
                string query = @"SELECT [Id] ,[CategoryId]
                                ,[Name]
                                ,[Description]
                                ,[Price]
                                ,[CreatedDate]
                                FROM [dbo].[Products]
                                WHERE [Id] = @Id";

                var product = await dbConnection.QueryFirstOrDefaultAsync<Product>(query, new{ @Id = id });

                return product;
            }
        }
        public async Task<IEnumerable<Product>> GetAllAsync()
        {
            //TODO: Paging...
            using (IDbConnection dbConnection = _connection)
            {
                string query = @"SELECT [Id] ,[CategoryId]
                                ,[Name]
                                ,[Description]
                                ,[Price]
                                ,[CreatedDate]
                                FROM [dbo].[Products]";

                var product = await dbConnection.QueryAsync<Product>(query);

                return product;
            }
        }

        public async Task AddAsync(Product product)
        {
            using (IDbConnection dbConnection = _connection)
            {
                string query = @"INSERT INTO [dbo].[Products] (
                                [Id],
                                [CategoryId],
                                [Name],
                                [Description],
                                [Price],
                                [CreatedDate]) VALUES (
                                @Id,
                                @CategoryId,
                                @Name,
                                @Description,
                                @Price,
                                @CreatedDate)";

                await dbConnection.ExecuteAsync(query, product);
            }
        }
    }
}
Kodlama sırasında dikkat ederseniz eğer, Dapper’ın async method’larını kullanmaya çalıştık. Buraya kadar olan noktada, “Controller“, “Business” ve “Data” işlemlerini tamamladık.
Global Exception Handling with Serilog
Bu noktada exception handling konusunda bir kaç farklı alternatifimiz var. İster middleware‘i tercih edebiliriz, istersek de MVC exception filters attribute’ünü. Ben bu noktada, middleware’i kullanmayı tercih edeceğim. Çünkü general case’ler karşısında MVC exception filter’larının, yeterince flexible olmadığı söyleniyor.
Bunun için nuget üzerinden Serilog’un file logger’ını, projemize aşağıdaki gibi dahil edelim.
dotnet add package Serilog.Extensions.Logging.File

Implementasyon için “Middlewares” isminde yeni bir folder oluşturalım ve içerisinde aşağıdaki gibi “GlobalExceptionMiddleware” isminde bir class tanımlayalım.
using System;
using System.Threading.Tasks;
using Microsoft.AspNetCore.Http;
using Microsoft.Extensions.Logging;

namespace aspnetcore_rest_api_with_dapper.Middlewares
{
    public class GlobalExceptionMiddleware
    {
        private readonly ILogger _logger;
        private readonly RequestDelegate _next;

        public GlobalExceptionMiddleware(RequestDelegate next, ILoggerFactory logger)
        {
            _next = next;
            _logger = logger.CreateLogger("GlobalExceptionMiddleware");
        }

        public async Task Invoke(HttpContext context)
        {
            try
            {
                await _next(context);
            }
            catch (Exception ex)
            {
                 _logger.LogError(0, ex, ex.Message);
            }
        }
    }
}
Middleware içerisinden exception’ları, yukarıdaki gibi basit bir şekilde handle ettik. Şimdi tek yapmamız gereken şey “Startup.cs” içerisinden aşağıdaki gibi log file path’ini belirtmek ve middleware içerisine dahil etmek olacaktır.
public void Configure(IApplicationBuilder app, IHostingEnvironment env, ILoggerFactory loggerFactory)
{
    loggerFactory.AddFile("C:/@Logs/aspnetcore-rest-api-with-dapper-{Date}.txt");

    app.UseMiddleware(typeof(GlobalExceptionMiddleware));
    app.UseMvc();
}
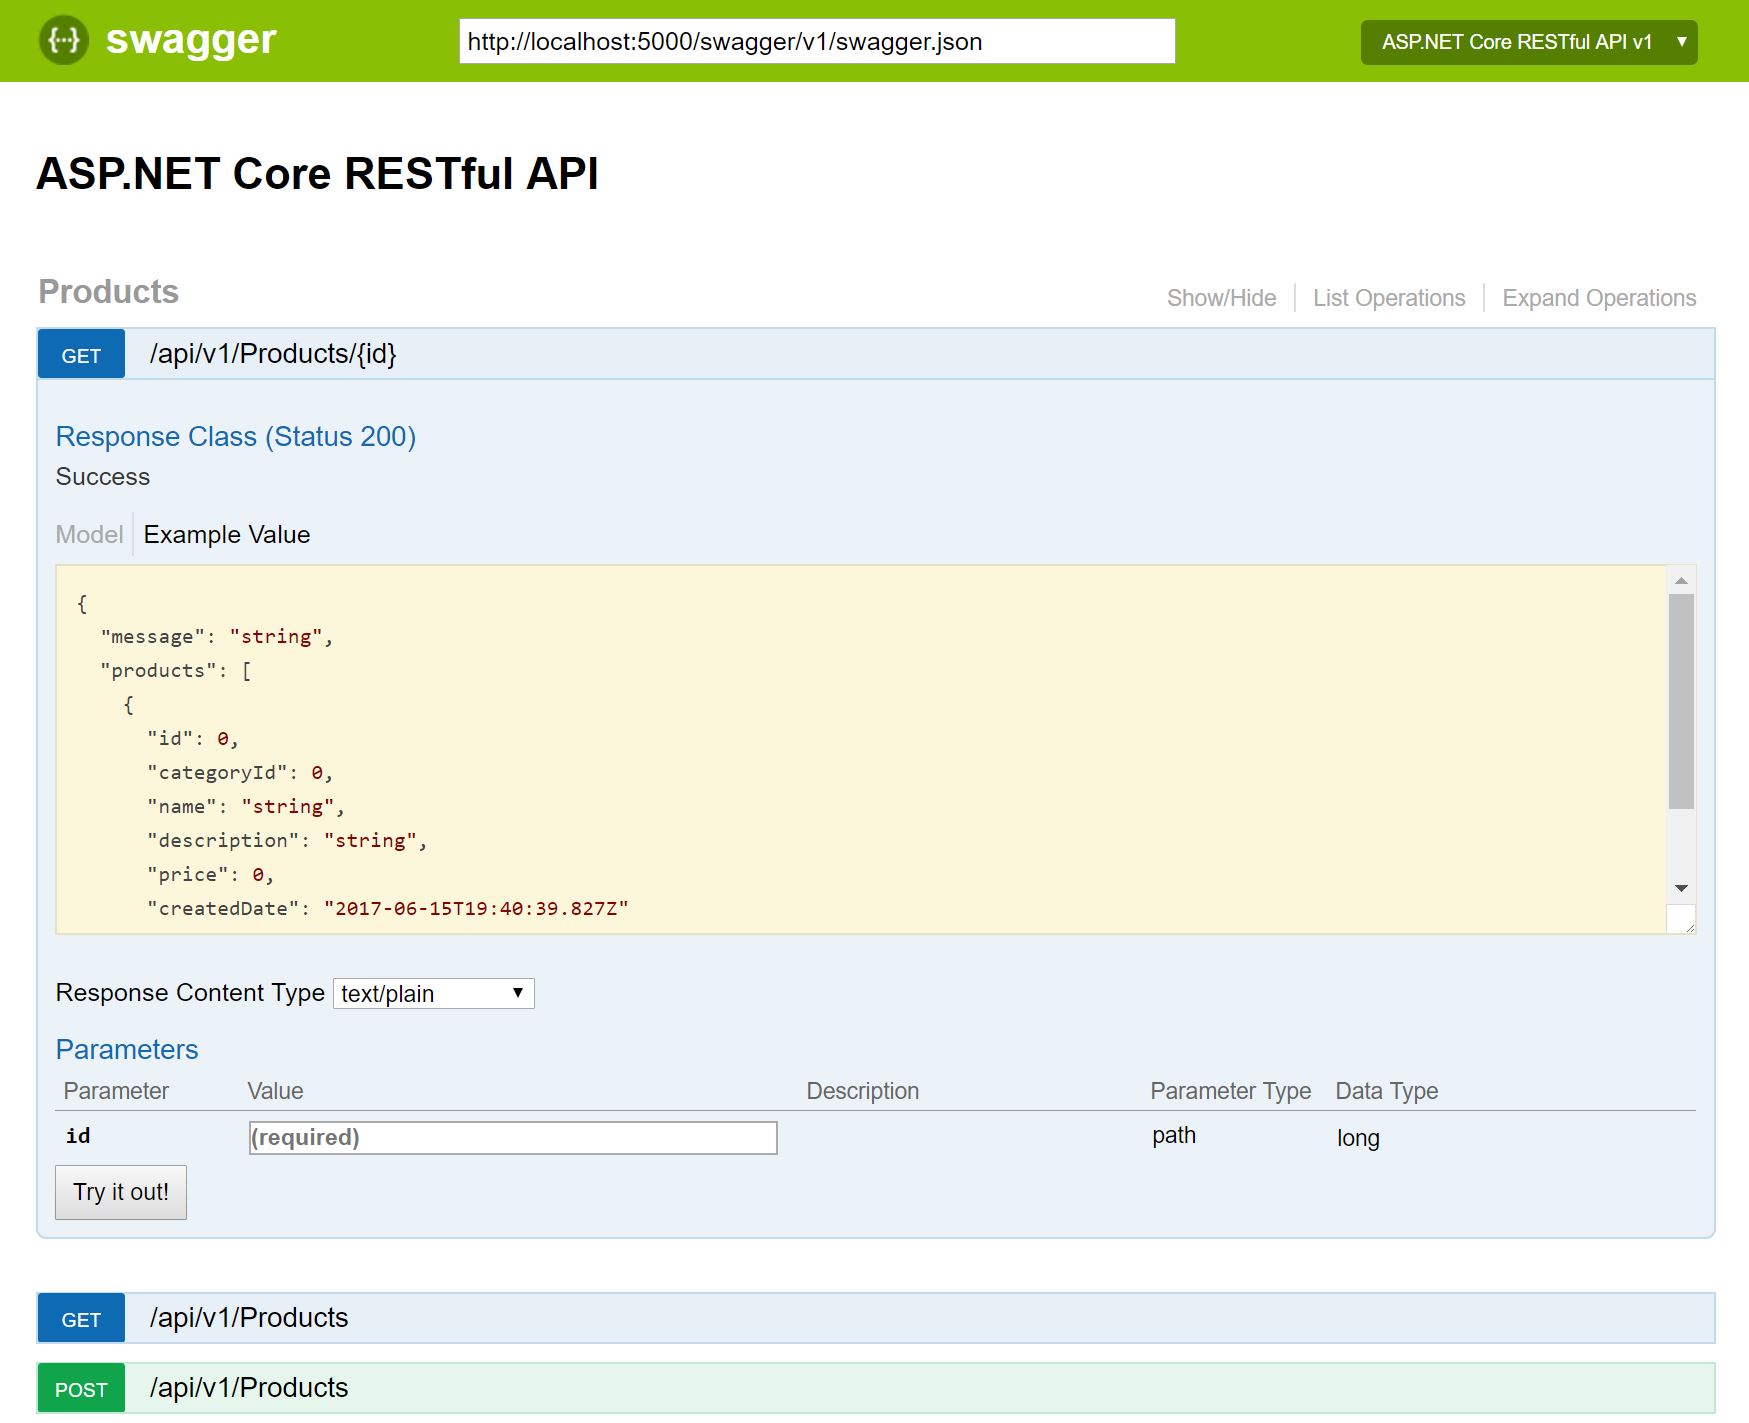
Swagger Implementasyonu
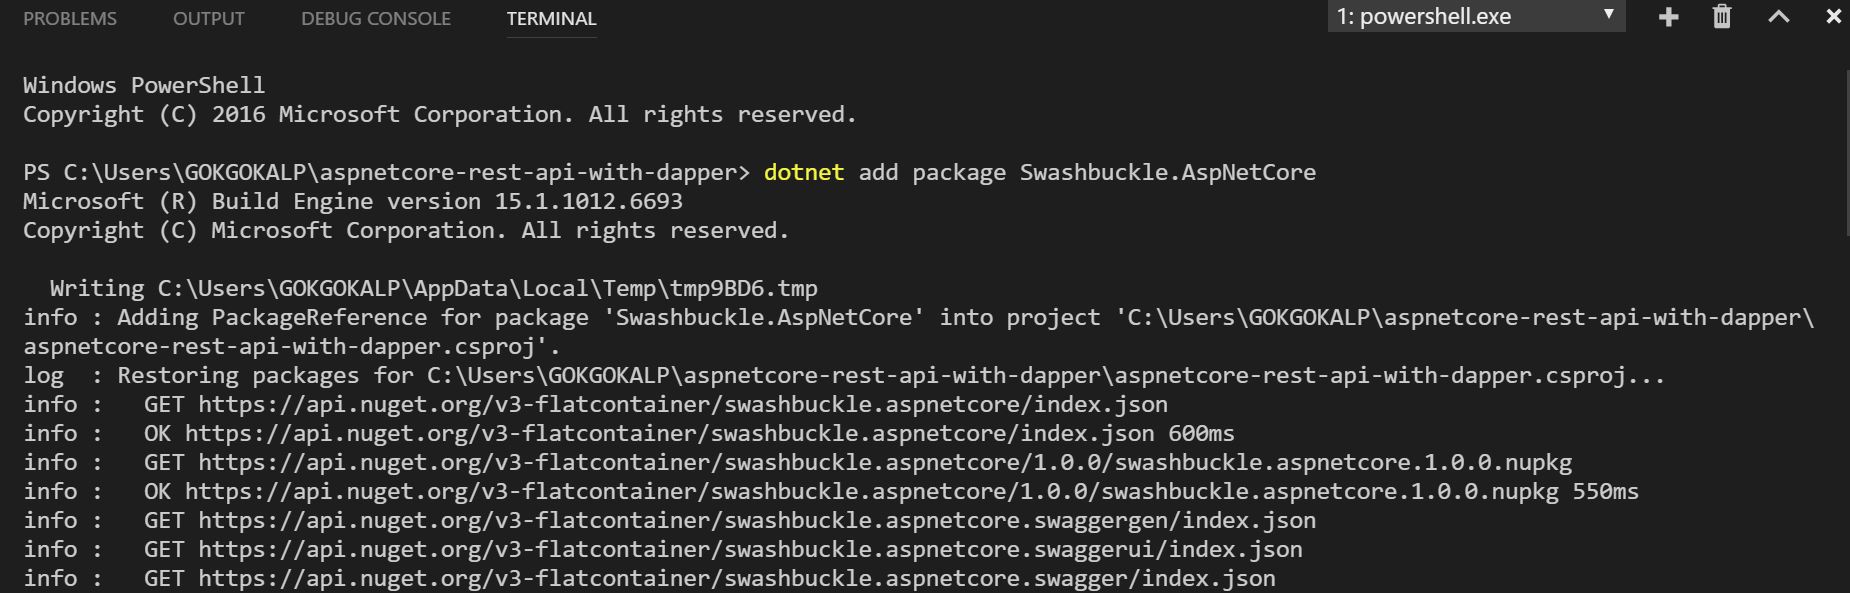
API’ın consume işlemleri sırasında biz developer’lara çok fazla kolaylık sağlayan Swagger’ın implementasyon işlemini gerçekleştirebilmek için, öncelikle nuget üzerinden projemize aşağıdaki gibi dahil etmemiz gerekmektedir.
dotnet add package Swashbuckle.AspNetCore
Şimdi ise “Startup.cs” içerisinden, Swagger’ı aşağıdaki gibi aktif hale getirelim.
public void ConfigureServices(IServiceCollection services)
{
    // Register the Swagger generator, defining one or more Swagger documents
    services.AddSwaggerGen(c =>
    {
        c.SwaggerDoc("v1", new Info { Title = "ASP.NET Core RESTful API", Version = "v1" });
    });
}

public void Configure(IApplicationBuilder app, IHostingEnvironment env, ILoggerFactory loggerFactory)
{
    loggerFactory.AddFile("C:/@Logs/aspnetcore-rest-api-with-dapper-{Date}.txt");

    app.UseMiddleware(typeof(GlobalExceptionMiddleware));
    app.UseMvc();

    // Enable middleware to serve generated Swagger as a JSON endpoint.
    app.UseSwagger();

    // Enable middleware to serve swagger-ui (HTML, JS, CSS etc.), specifying the Swagger JSON endpoint.
    app.UseSwaggerUI(c =>
    {
        c.SwaggerEndpoint("/swagger/v1/swagger.json", "ASP.NET Core RESTful API v1");
    });
}
Projeyi çalıştırdıktan sonra tek yapmamız gereken şey artık, “http://localhost:5000/swagger” URL’ı üzerinden erişmek olacaktır.
Application Service’lerin Inject Edilmesi
Hatırlarsak bölümün başında “IProductBusiness” ve “IProductRepository” interface’lerini, constructor’lar üzerinden inject ederek kullanmıştık. Resolve işlemlerinin gerçekleşebilmesi için “Startup.cs” içerisinden, application service’ler arasına ilgili type’ları tanımlamamız gerekmektedir.
Bunun için:
public void ConfigureServices(IServiceCollection services)
{
    // Add framework services.
    services.AddMvc();

    // Add application services.
    services.AddTransient<IProductBusiness, ProductBusiness>();
    services.AddTransient<IProductRepository, ProductRepository>();

    // Register the Swagger generator, defining one or more Swagger documents
    services.AddSwaggerGen(c =>
    {
        c.SwaggerDoc("v1", new Info { Title = "ASP.NET Core RESTful API", Version = "v1" });
    });
}
Artık projemiz tamamen hazır durumda.
Terminal üzerinden “dotnet build” yazarak kodu derleyelim ve ardından “dotnet run” komutu ile Kestrel vasıtasıyla projeyi çalıştırabiliriz.
Çalıştırdıktan sonra Swagger’a, “http://localhost:5000/swagger” URI’ı üzerinden erişebiliriz.
Azure App Services’e Deploy İşlemi
Bunun için öncelikle aşağıdaki adımları sırasıyla uygulamamız gerekmektedir.
- Azure portal üzerine login olalım.
- Sol üst menüden “New” kısmına tıklayalım.
- Açılan menüden aşağıdaki gibi “Web + Mobile > Web App” kısmını seçelim.

- Eğer subscription yoksa, açılacak ekran üzerinden “Sign up for a new subscription” kısmına gelerek, bir aylık deneme sürümünü elde edelim.
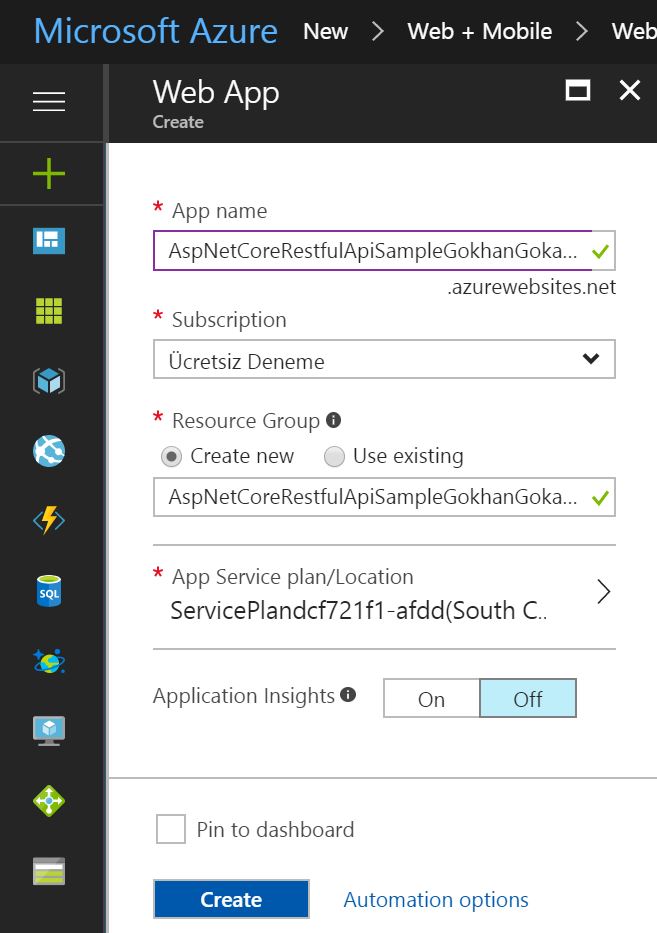
- “Name” kısmına uygulamamızın adını unique olacak şekilde belirlememiz gerekmektedir. Ben burada aşağıdaki gibi “AspNetCoreRestfulApiSampleGokhanGokalp” olarak ayarlıyorum ve create butonuna basıyorum. (Bu işlem biraz vakit alacaktır.)
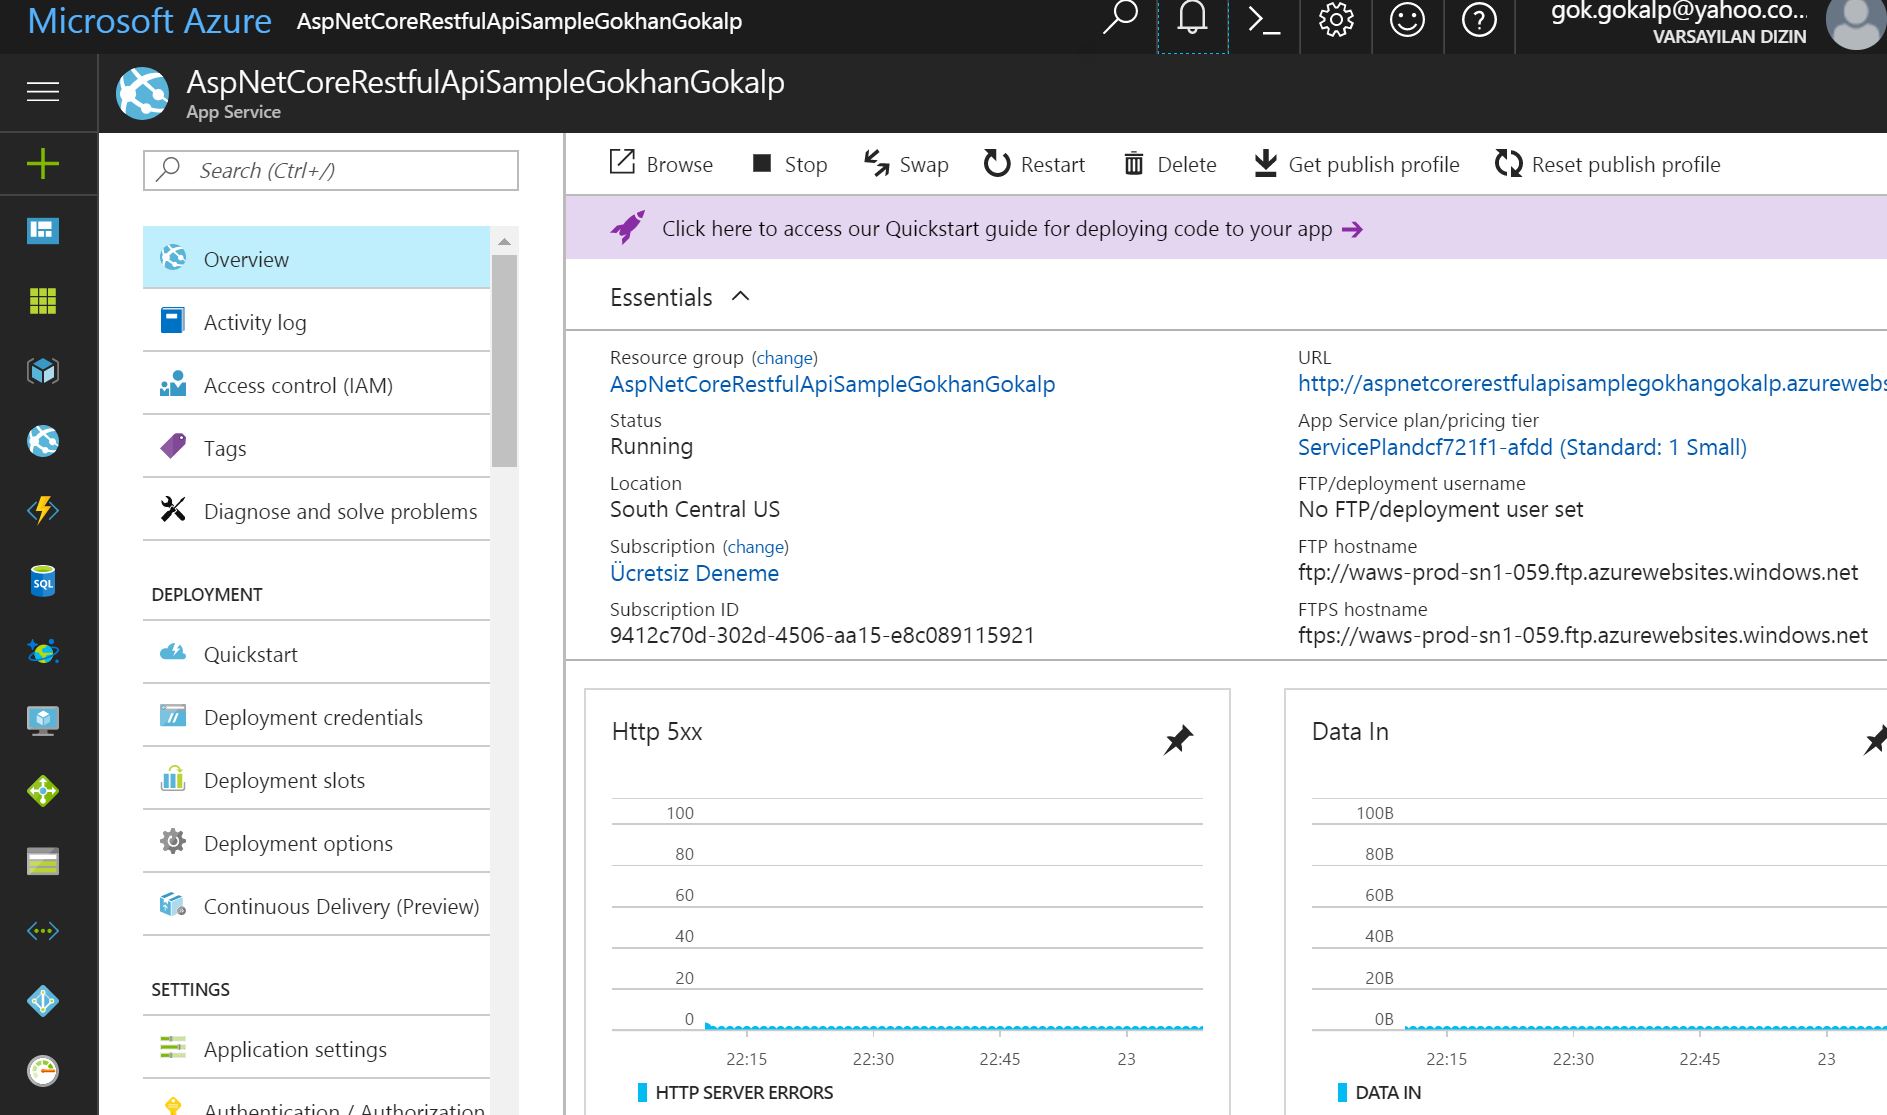
- Create butonuna bastıktan sonra deployment işlemi bittiğinde, “Deployments succeeded” şeklinde bir bildirim alacağız ve aşağıdaki gibi bir ekran görüyor olmalıyız.
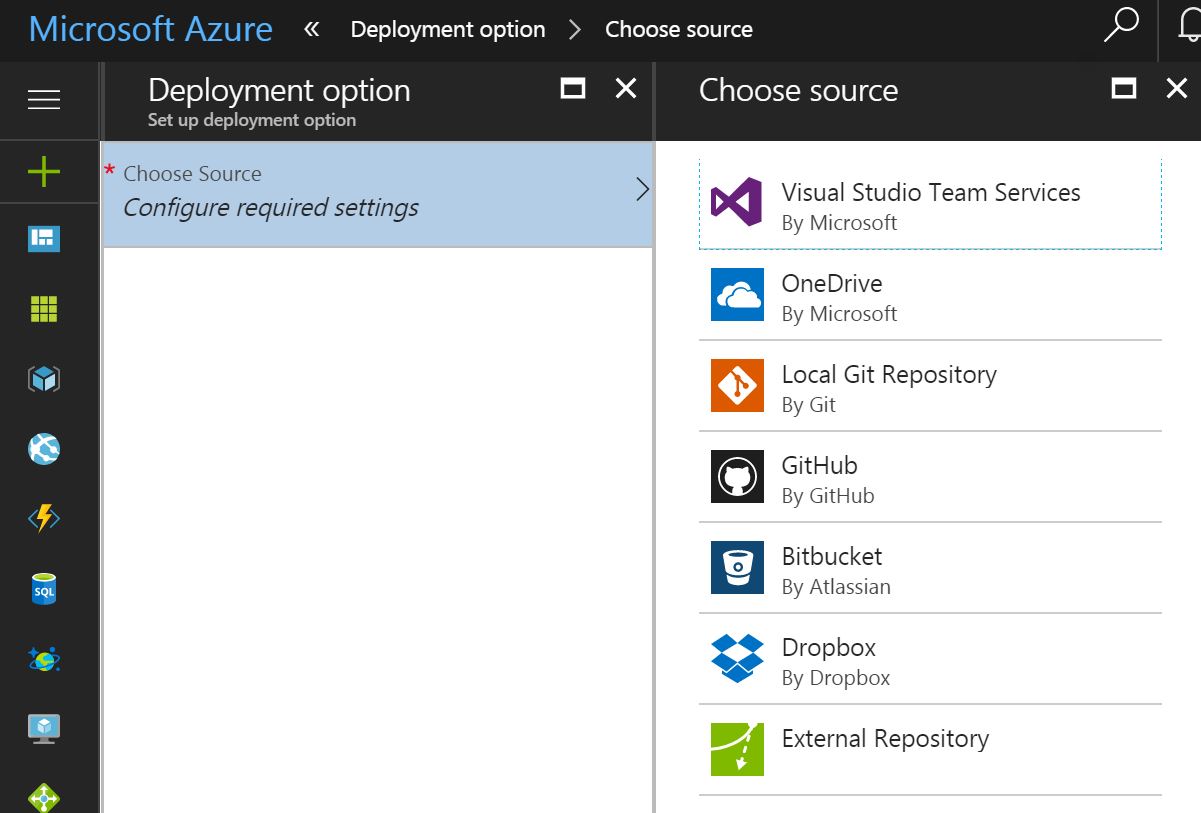
- Şimdi sol menüde bulunan “Deployment options” kısmına girelim ve “Local Git Repository” kısmına tıklayalım.
- Daha sonra basic authentication işlemi için “Deployment user name” ve “Password” belirleyelim.
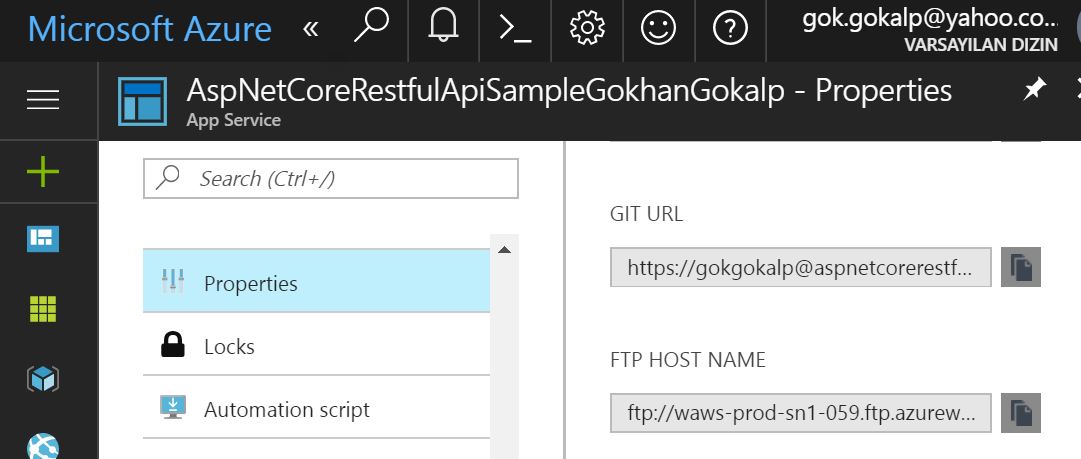
- Şimdi sol menüden “Settings > Properties” kısmına girelim ve orada yer alan “GIT URL” kısmını kopyalayalım.

Artık projeyi Azure App Service üzerine publish etmek için hazırız.
Öncelikle bunun için Visual Studio Code üzerinden bir local Git repository oluşturmamız gerekiyor.
Sol menüden “Source Control” menüsüne geldikten sonra, “Initialize git repository” kısmına tıklayalım ve ardından “Commit All” butonuna basalım.![]()
Daha sonra aşağıdaki komutu terminal üzerinden çalıştıralım.
git remote add azure [URL for remote repository]
Şimdide credential bilgilerinin push işlemlerinde otomatik eklenebilmesi için, aşağıdaki komutu çalıştıralım.
git config credential.helper store
Artık push işlemini gerçekleştirebiliriz. Bunun için aşağıdaki komutu kullanabiliriz:
git push -u azure master

Tüm işlemlerin bitiminin ardından ise, aşağıdaki gibi bir kaç satır görüyor olacağız.
remote: Finished successfully.
remote: Running post deployment command(s)...
remote: Deployment successful.
To https://aspnetcorerestfulapisamplegokhangokalp.scm.azurewebsites.net:443/AspNetCoreRestfulApiSampleGokhanGokalp.git
 * [new branch]      master -> master
İşte bu kadar. Azure App Services üzerinde host etmiş olduğumuz projeye artık, buradan erişim sağlayabilirsiniz: http://aspnetcorerestfulapisamplegokhangokalp.azurewebsites.net/swagger/
Umarım herkes için keyifli bir makale olmuştur. ASP.NET Core, gün geçtikçe dahada harika bir hal alarak ilerlemeye devam ediyor. Bir sonraki ASP.NET Core makale serisinde, görüşmek üzere.
https://github.com/GokGokalp/aspnetcore-rest-api-with-dapper
Bazı referanslar:
https://github.com/Microsoft/azure-docs/blob/master/articles/app-service-web/web-sites-create-web-app-using-vscode.md
https://docs.microsoft.com/en-us/aspnet/core/tutorials/web-api-help-pages-using-swagger
Hocam şu ProdcutResponse oluşturulurken
public ProductResponse()
{
Products = new List();
}
ve
public List Products { get; set; }
kısımlarında List’ler kızarıyor sebebi nedir?
Merhaba, kodları şekillendirmek için kullandığım plugin den kaynaklı sanırım type’lar gitmiş. 🙁 Farketmemiştim. Düzelteceğim, teşekkürler.
“public List Products” şeklinde olacaktı.
Hocam peki dapper referance nasıl ekleyeceğiz arama kısmına yazdığımda bulamadım
Merhaba, “dotnet add package Dapper” komutunu çalıştırıp, ardından “dotnet restore” yapmanız gerekmektedir.
her şey iyi hoş lakin neyi neden yaptığımızı hiç anlamadım keşke yeni başlayanların da anlayabileceği bir dilden anlatsaydınız
Yazdığım bazı makaleler, genelde bu teknolojileri .NET Framework’de kullanan kitleye hitap etmektedir. Amacı ise başlığında olduğu gibidir aslında. Dapper kullanarak RESTful bir API tasarlama ve biraz da Azure App Servis’i göstermek. Yorumun için teşekkürler.
Hocam merhaba,
Since ‘ProductsController.Get()’ is an async method that returns ‘Task’, a return keyword must not be followed by an object expression. Did you intend to return ‘Task’? [aspnetcore-rest-api-with-dapper]
şeklinde bir hata alıyorum çözümü nedir acaba?
Hocam biraz çaba sarfettikten sonra daha da iyi oturdu her şey. Teşekkürler ekstradan verdiğiniz cevaplar için 🙂
Teşekkür ederim. 🙂
DI için Autofac imi tercih edersiniz yoksa .net core la gelen DI yımı.
Merhaba, genelde benim tercihim .NET Core içerisinde build-in olarak gelen DI’ı kullanmak. Bazı makalelerde ise autofac gibi library’lerin dependency load işlemlerinin bir tık daha hızlı olduğu söyleniyor, ama ne derecede ne farkeder bilemiyorum. 🙂
Merhaba, test işlemlerini yaptığımda Post metodu olumlu yanıt veriyor fakat tabloya veriyi eklemiyor. Sebebini anlayamadım. Post etmeye çalıştıgım veri aşağıdaki gibi. Olası nedenleri ne dir?
{
“CategoryId”:”5″,
“Name”: “Seker”,
“Description”: “Tatli”,
“Price”:”250″
}
Merhaba, kusura bakmayın geç cevap için.
Create için ilgili örneği boş bıraktığım için geriye herhangi bir status code dönmediği için olumlu yanıt veriyordur. Debug ettiğinizde gönderdiğiniz parametreler ProductRequest e bind oluyor mu? Bir diğeride ProductRepository içerisindeki AddAsync method’undaki query’den [Id] kısmını çıkartıp bir deneyebilir misiniz?
Teşekkürler.
Dapper için güzel bir kaynak oldu çok teşekkürler. Performans için oldukça önemli bir ORM aracı haline geldi Dapper. Türkiye’dede kullanımı daha da yaygınlacak.
Ben teşekkür ederim. Kesinlikle katılıyorum. 🙂